Install a Cloudflare Tunnel on TrueNAS Scale

1. Prerequisites

While installing Traefik is not essential, it is recommended. Traffic routing can be managed in Cloudflare, but it is easier with Traefik. This guide assumes you have Traefik installed.

2. Summary

To configure the TrueNAS App cloudflared the following information is required to be entered in the configuration.

  • Cloudflare Tunnel Token.
  • Configure Cloudflare with access control for the domain.

This post details the process of configuring the TrueNAS Cloudflared app with the necessary token. It guides users through configuring a Cloudflare tunnel and installing and configuring the Cloudflared app on TrueNAS Scale. It also covers how to restrict access by configuring Cloudflare Zero Trust authentication settings and setting policies for login.

3. Introduction

Setting up a Cloudflare Tunnel allows access to your services from the Internet. Cloudflare handles TLS security, enabling access through HTTPS. Cloudflare will also manage authentication if you set this up.

4. Setting up the Cloudflare Tunnel

Log in to your Cloudflare account. (If you haven’t already, set up two-factor authentication on your Cloudflare account!)

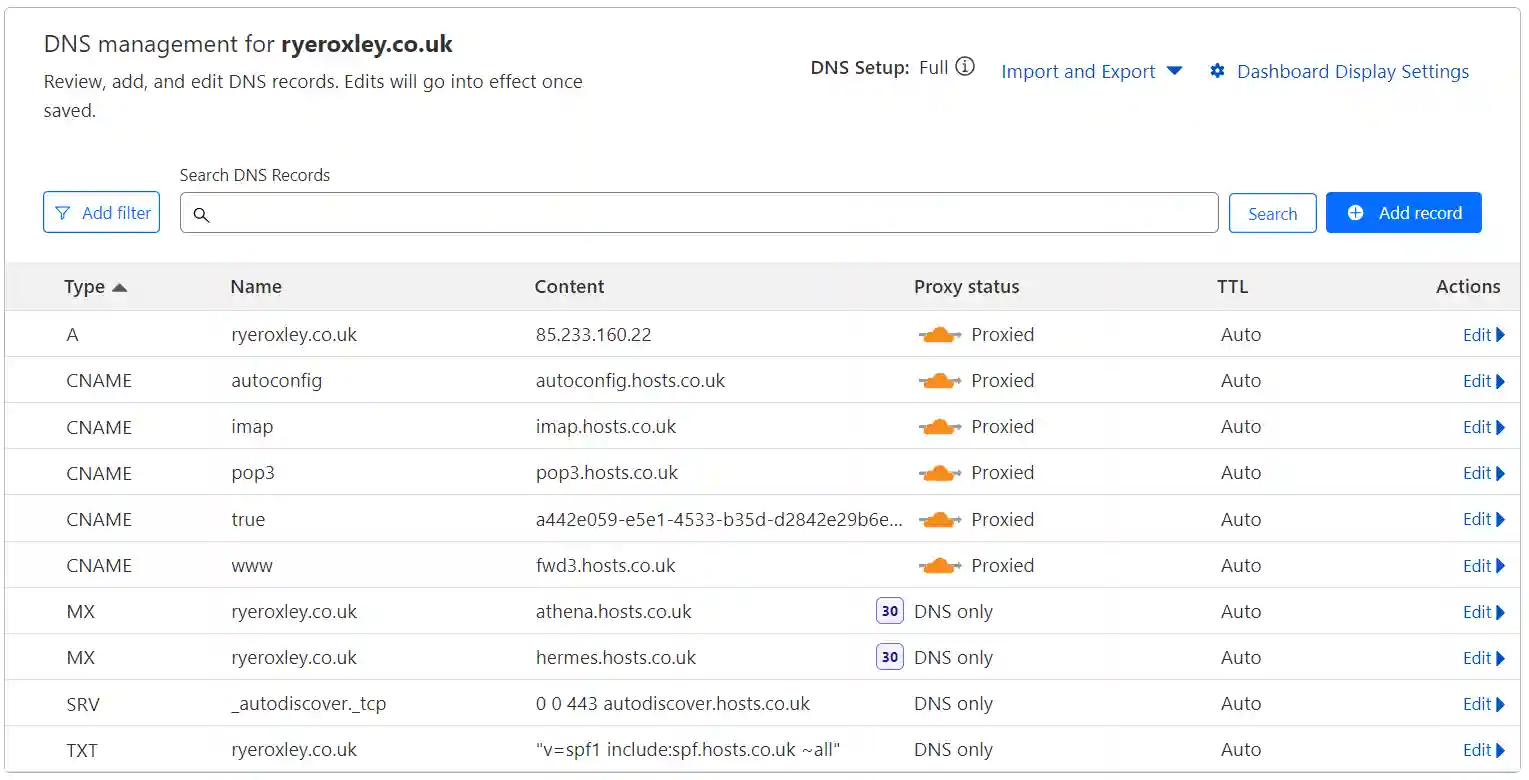
Review the Cloudflare DNS records before continuing and remove any that are not required. Click on the appropriate domain, then select DNS. Retain the A record and remove any CNAMEs that are not required.

Screenshot of a DNS management interface showing various records for the domain ryeroxley.co.uk, including A, CNAME, MX, SRV, and TXT types with details on proxy status, content, and TTL.

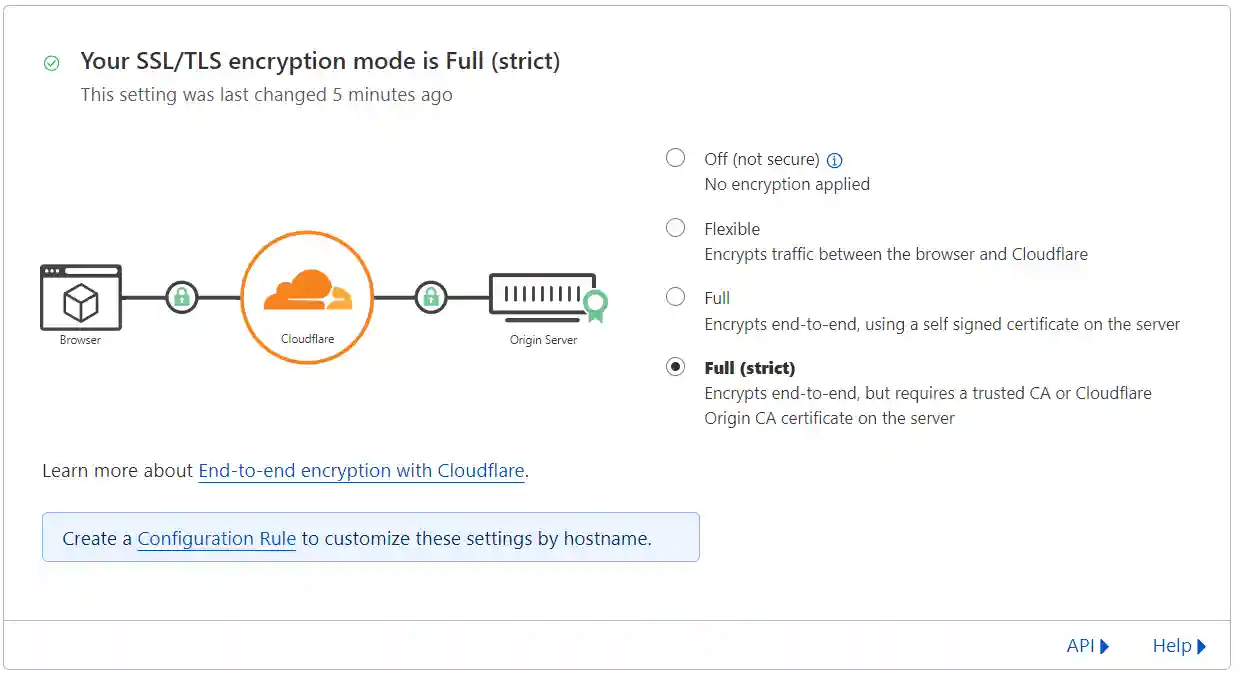
To ensure end-to-end security, it is necessary to enable Full (strict) encryption in Cloudflare. Navigate to your Cloudflare dashboard, select the SSL/TLS option, and ensure that Full (strict) is the active setting. If not, select Full (strict) and confirm the change to activate it.

Diagram showing SSL/TLS encryption modes with the "Full (strict)" option selected, highlighted by a green check mark. The diagram illustrates a data flow from a browser through Cloudflare to the origin server, symbolizing secure end-to-end encryption.

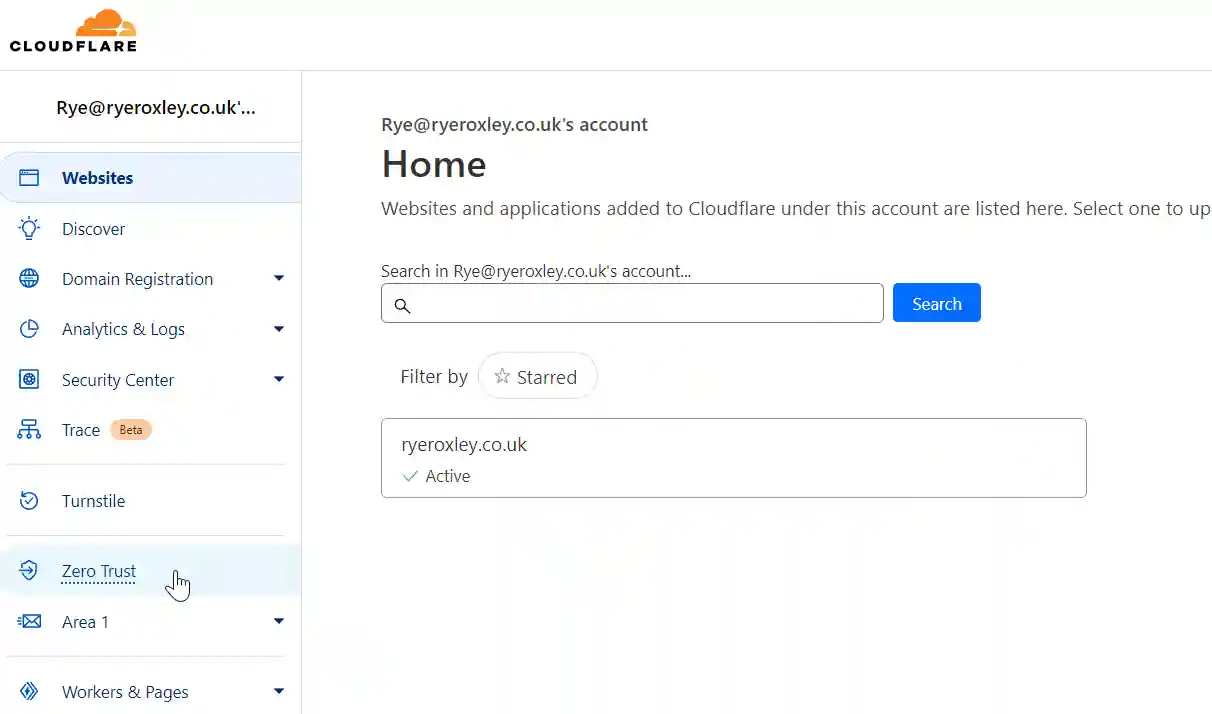
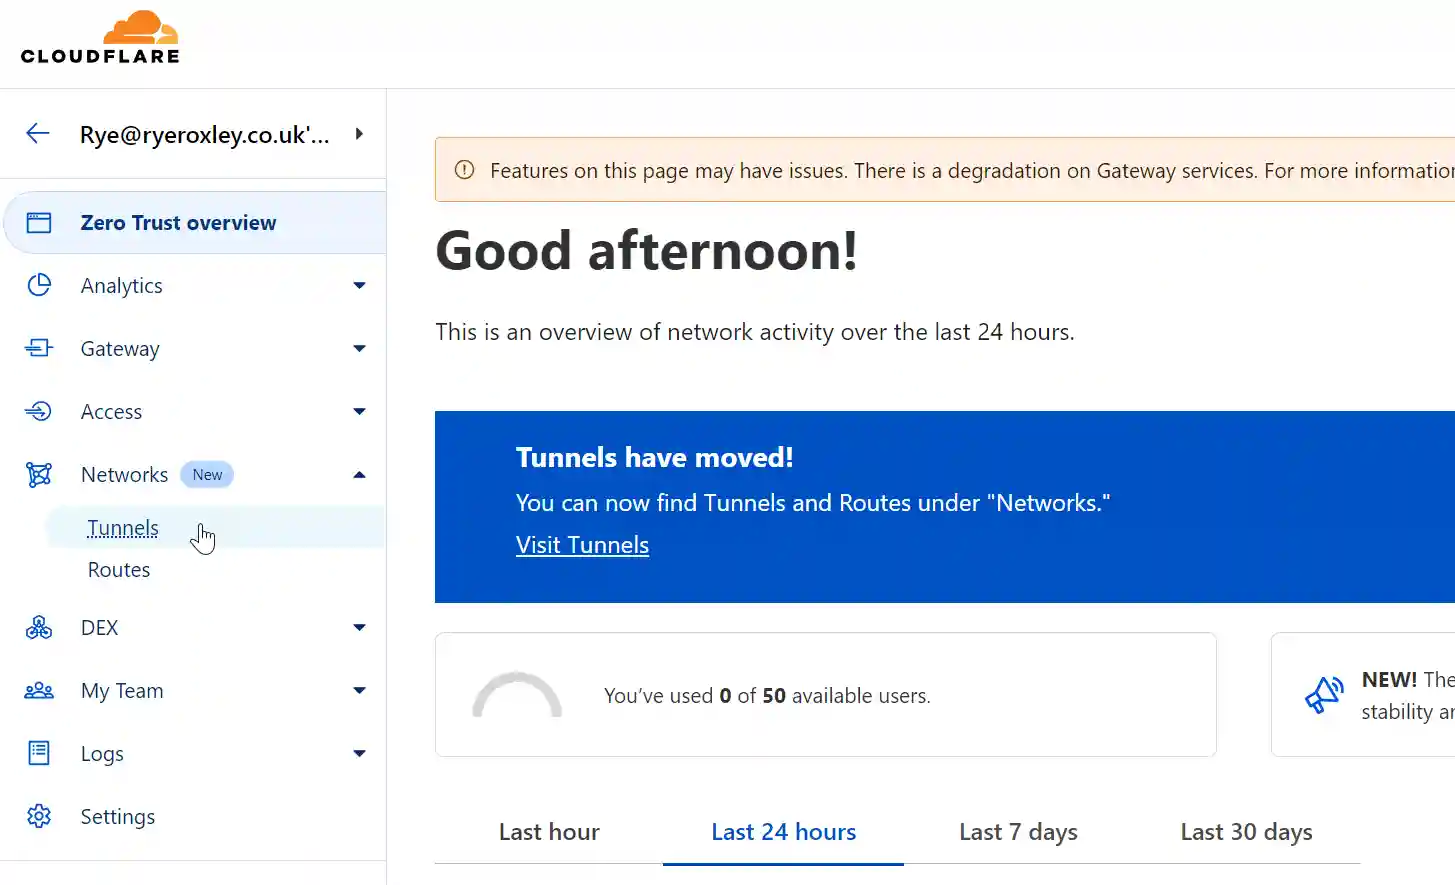
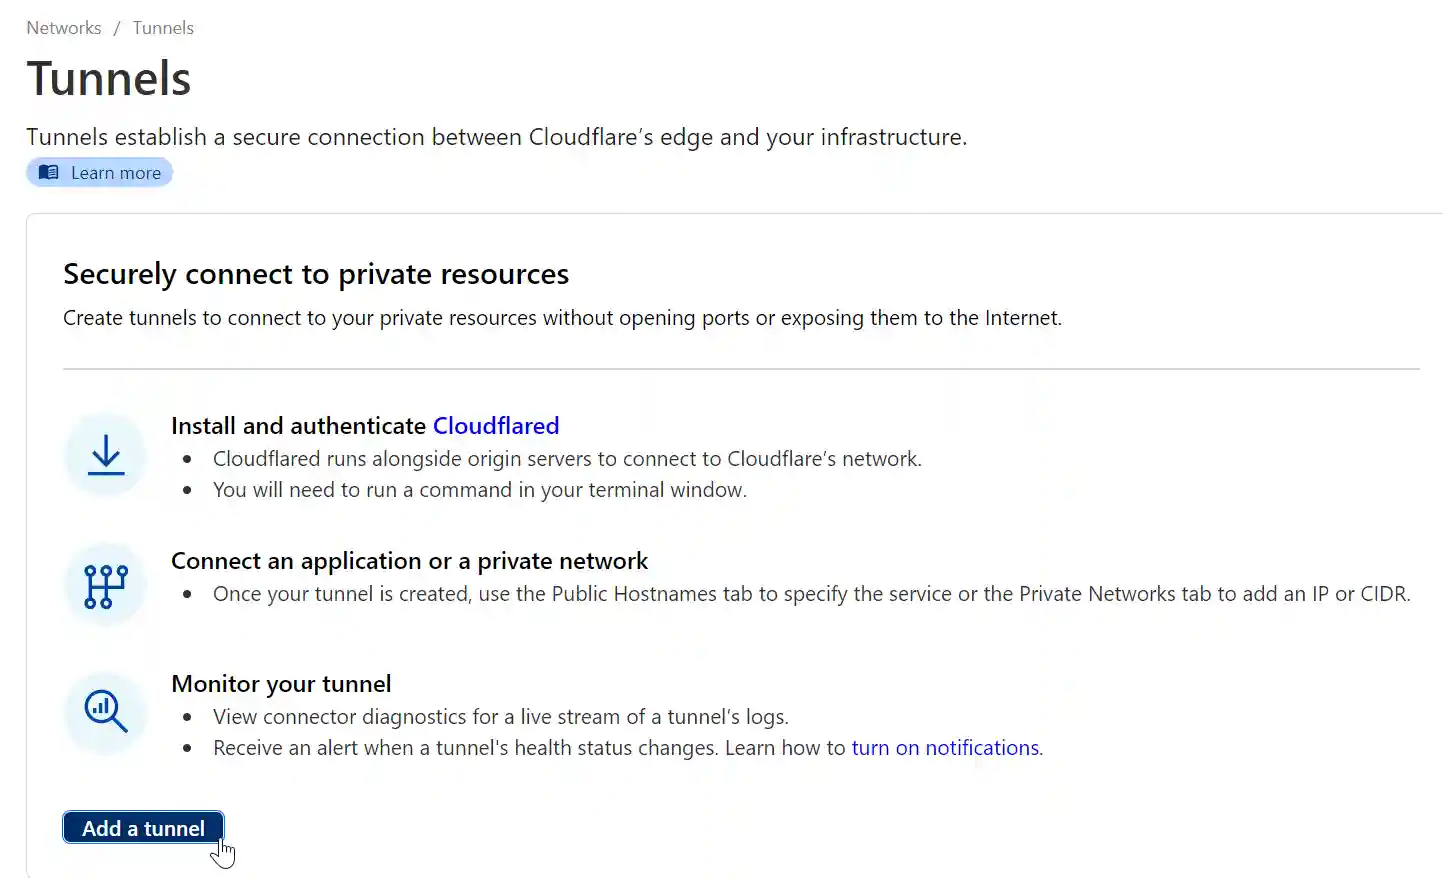
Return to Home, click on Zero Trust on the left-hand side, then from the Networks submenu, click on Tunnels. Click Add a tunnel.

Screenshot of a Cloudflare account dashboard for 'Rye@ryeroxley.co.uk' showing an active domain 'ryeroxley.co.uk' under the 'Home' section, with menu options like Websites, Analytics, Security Center, and Zero Trust.
Cloudflare dashboard screen displaying a 'Good afternoon!' greeting, a notification about Tunnels moving to the 'Networks' section, and a usage gauge showing 0 of 50 available users with time filters for network activity.
Cloudflare Tunnels setup page explaining how to securely connect to private resources, with steps to install Cloudflared, connect an application or private network, and monitor the tunnel, plus a button to 'Add a tunnel'.

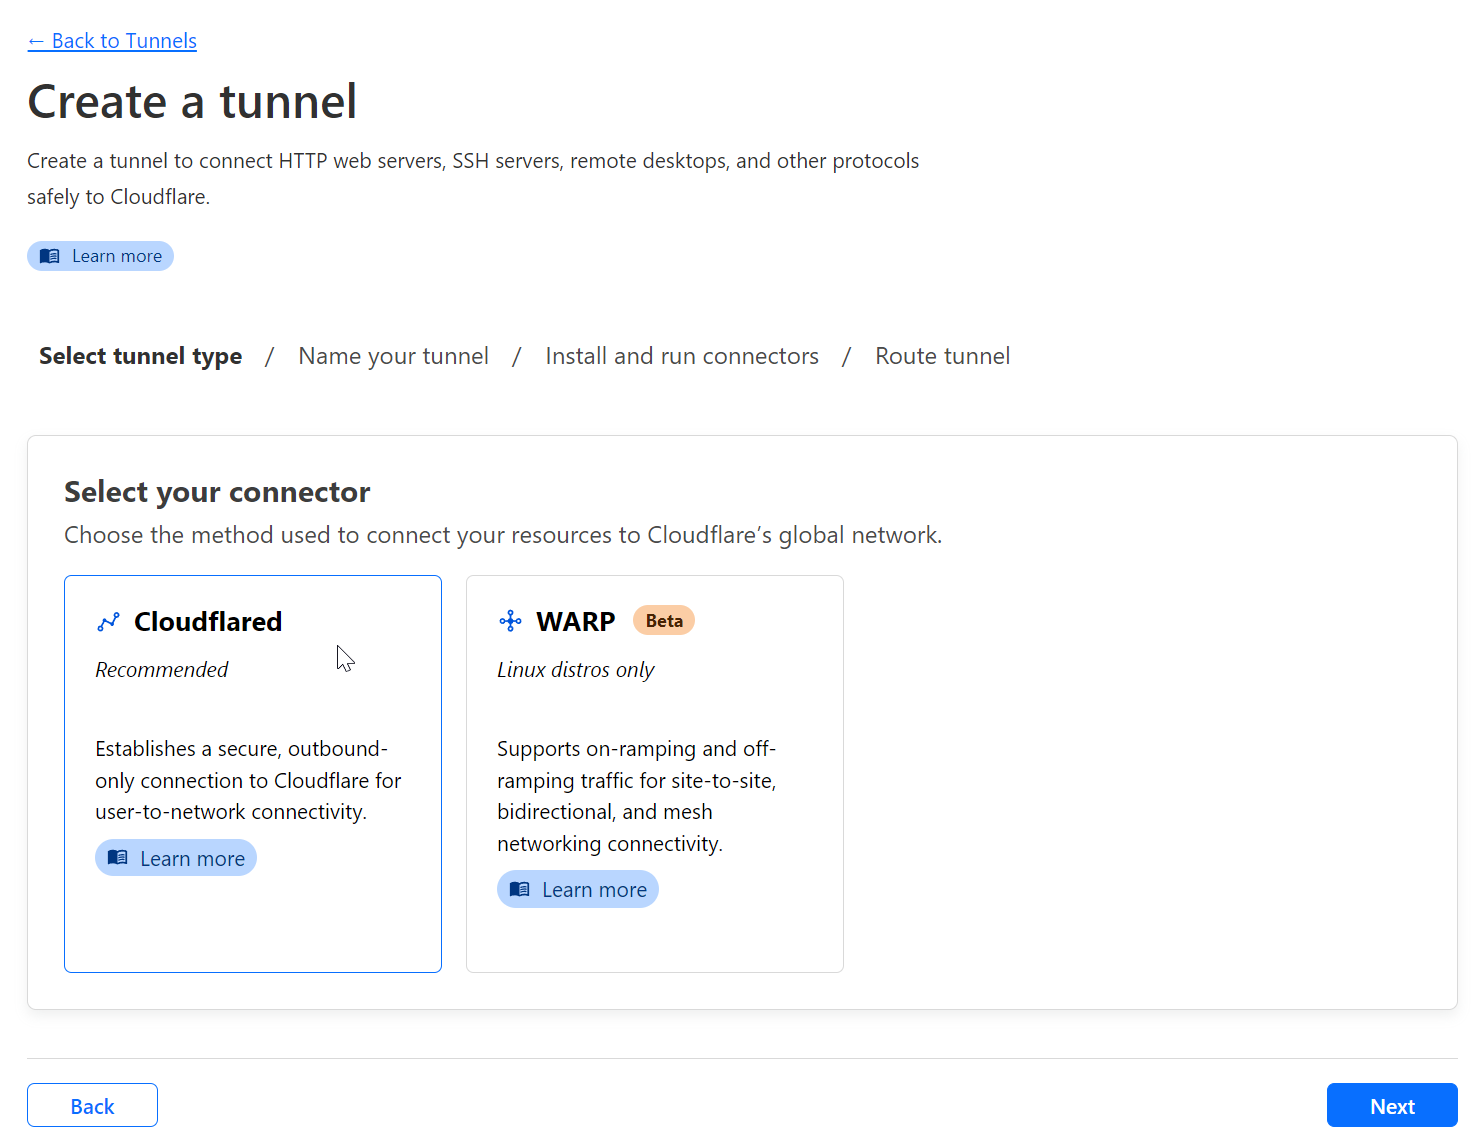
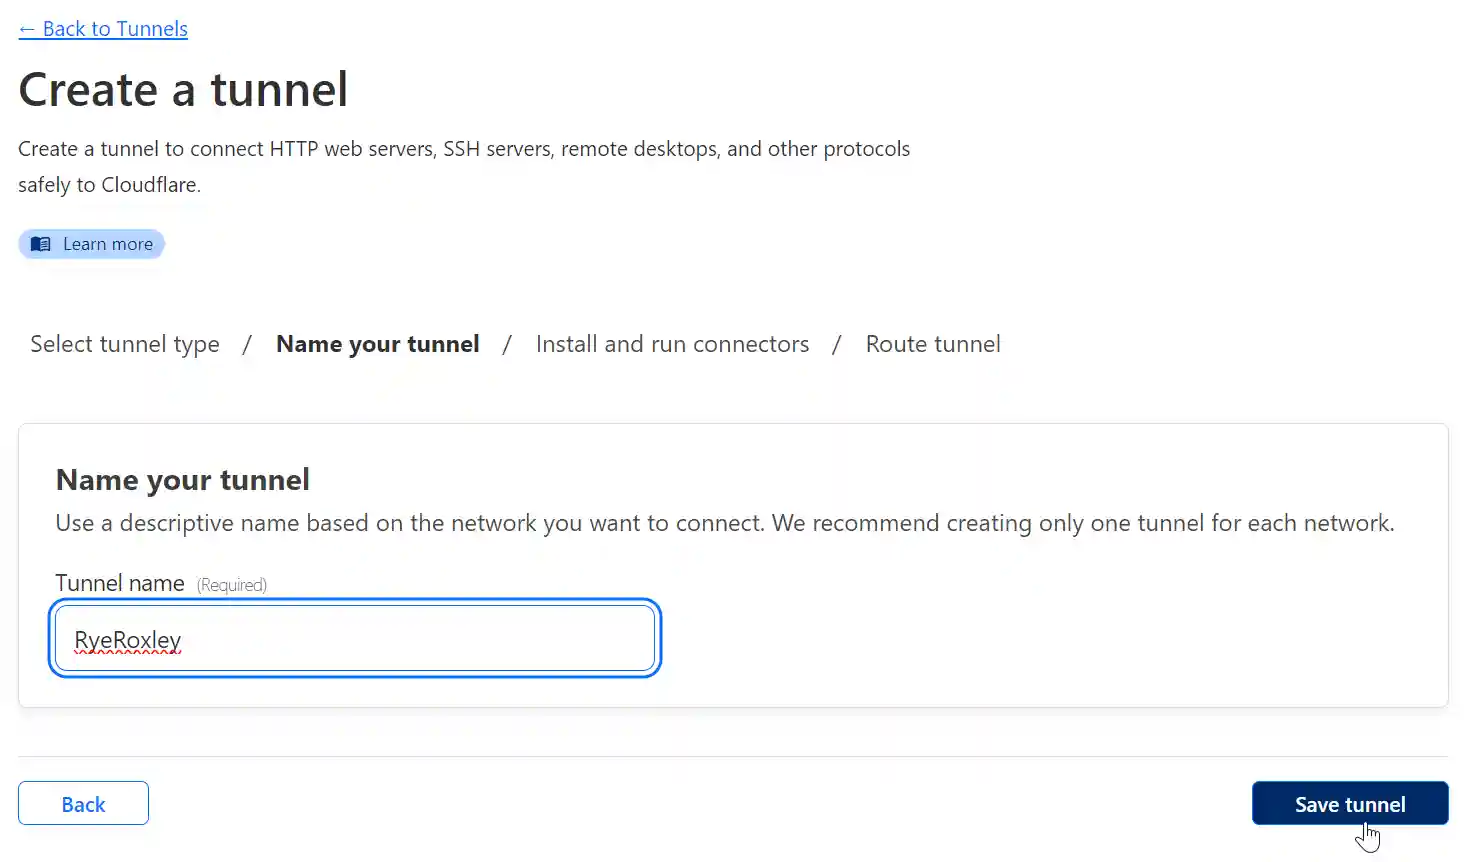
Ensure that Cloudflared is selected and click Next. Name your tunnel and click Save tunnel.

Step-by-step interface for creating a tunnel in Cloudflare, offering a choice between 'Cloudflared' (recommended) and 'WARP' (beta for Linux distros only) connectors.
Configuration page for naming a new tunnel in Cloudflare with the filled-in name 'RyeRoxley' ready for saving.
Step-by-step instructions for installing and running a connector for Cloudflare tunnels on various operating systems, with a warning to carefully store a sensitive token.

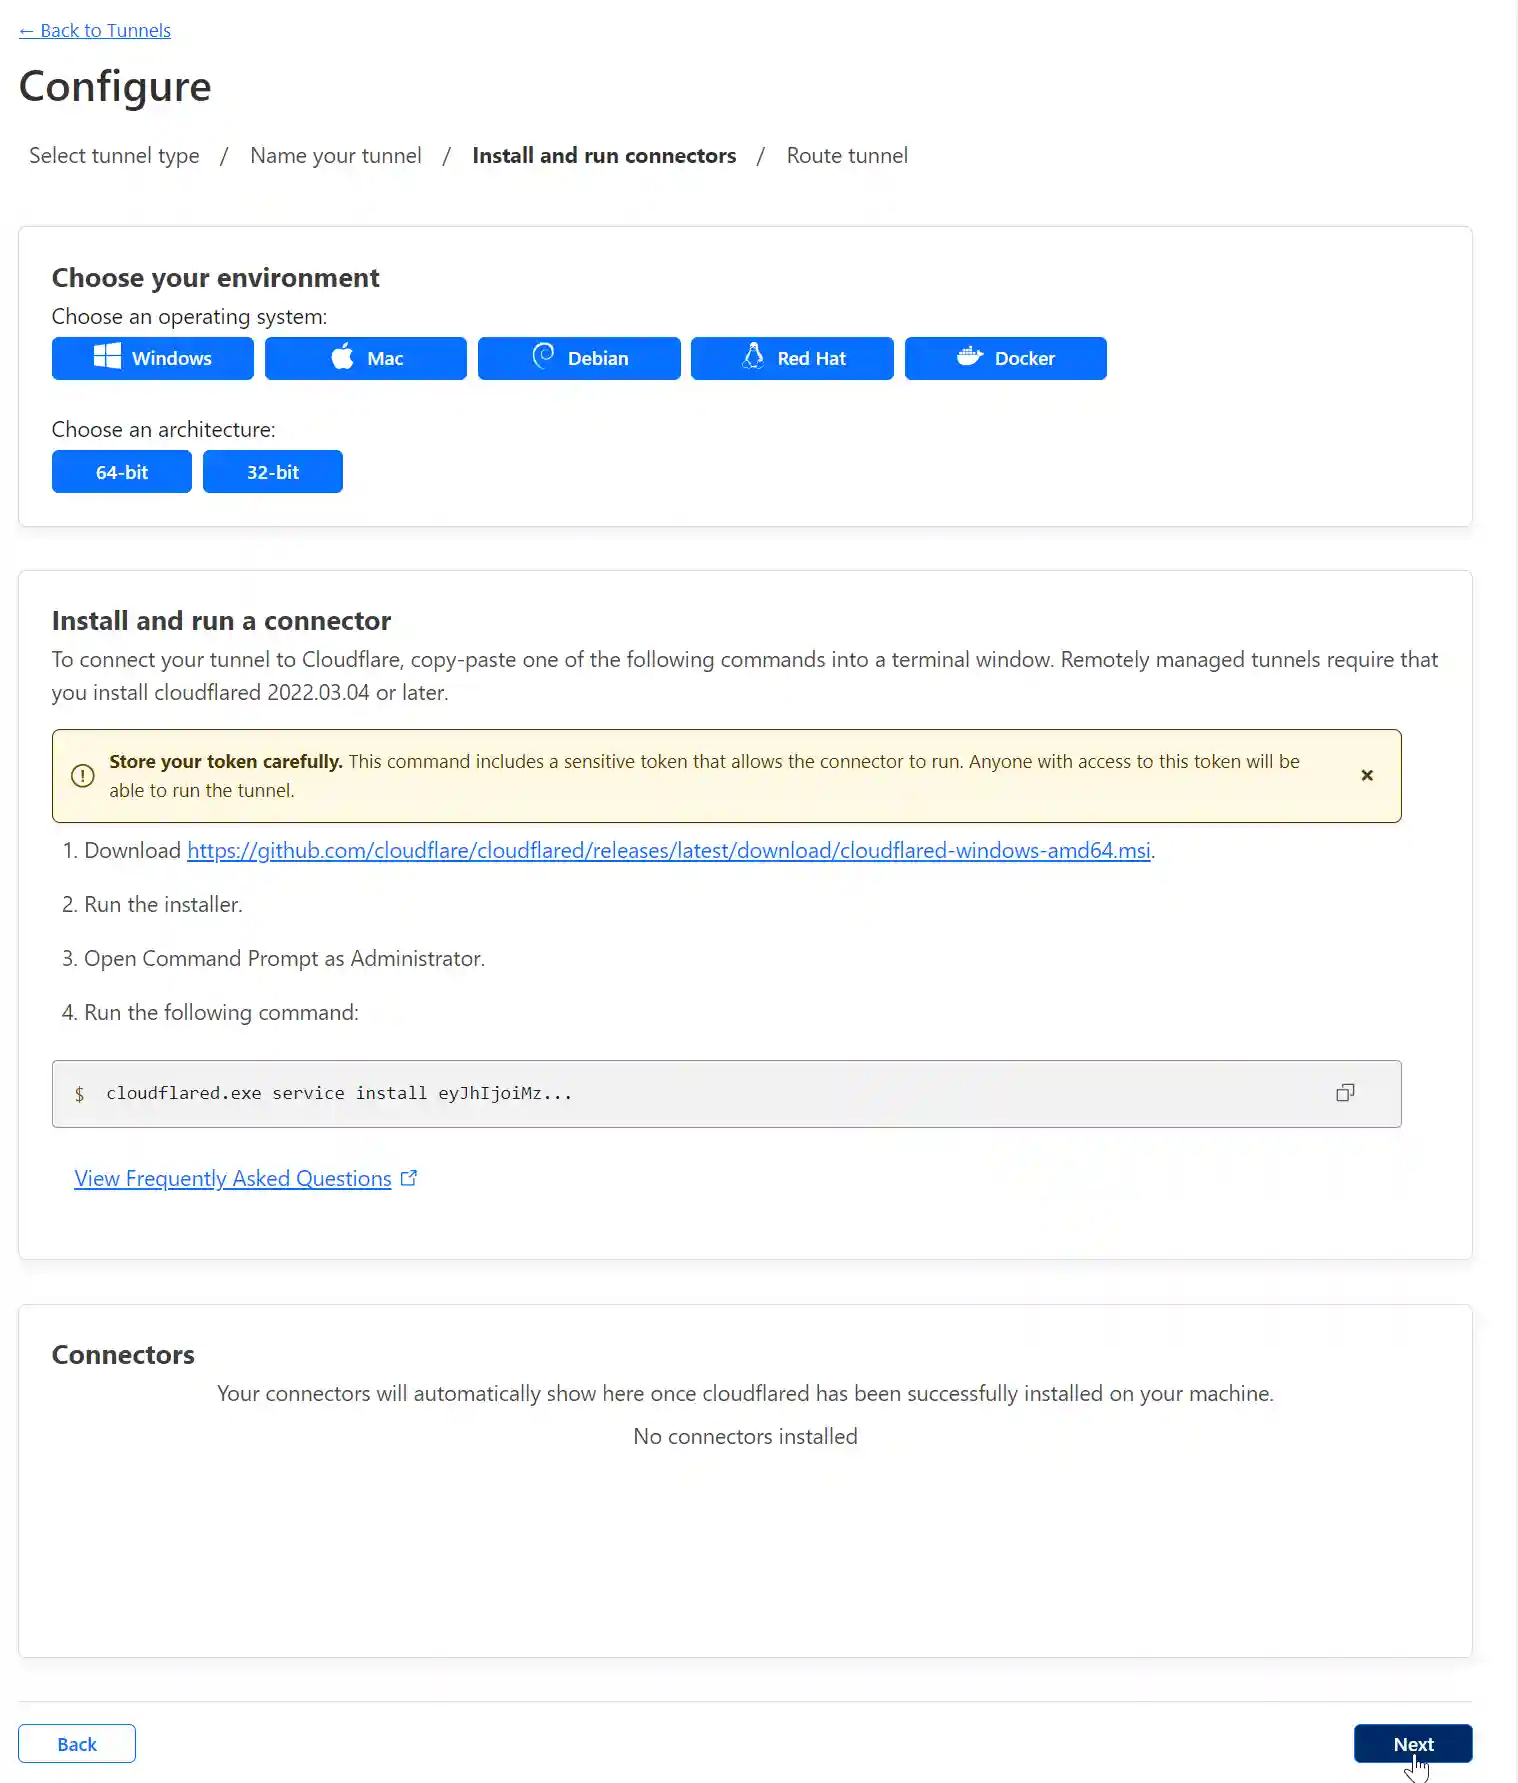
To implement a Cloudflare Tunnel in TrueNAS Scale Apps all we need is the Tunnel  Token. Copy the code to the clipboard and paste it into a text editor.

A command-line input field displaying the partial command '$ cloudflared.exe service install eyJhTjoiMz...', with a 'Copy to clipboard' button at the end of the field.

You should end up with something like this:

cloudflared.exe service install eyJhIjoiMzVjZTRkOTk3ODhhNDRmYjZkZjU5NTIyODBiZmIzNDkiLCJ0IjoiOTAzZDRlY2UtODRkZi00ZjY3LWI2YjAtNDBmNTQzYjRlODZhIiwicyI6Ik56UTFOVGhoTkdVdE5EQmlaUzAwT1RNeExXRmlaVFl0TXpZMVlXUTVNVFk1TnpjeSJ9

The Tunnel Token is the long string of letters and numbers after the "cloudflared.exe service install" Copy, paste and save the token, it will be needed later.

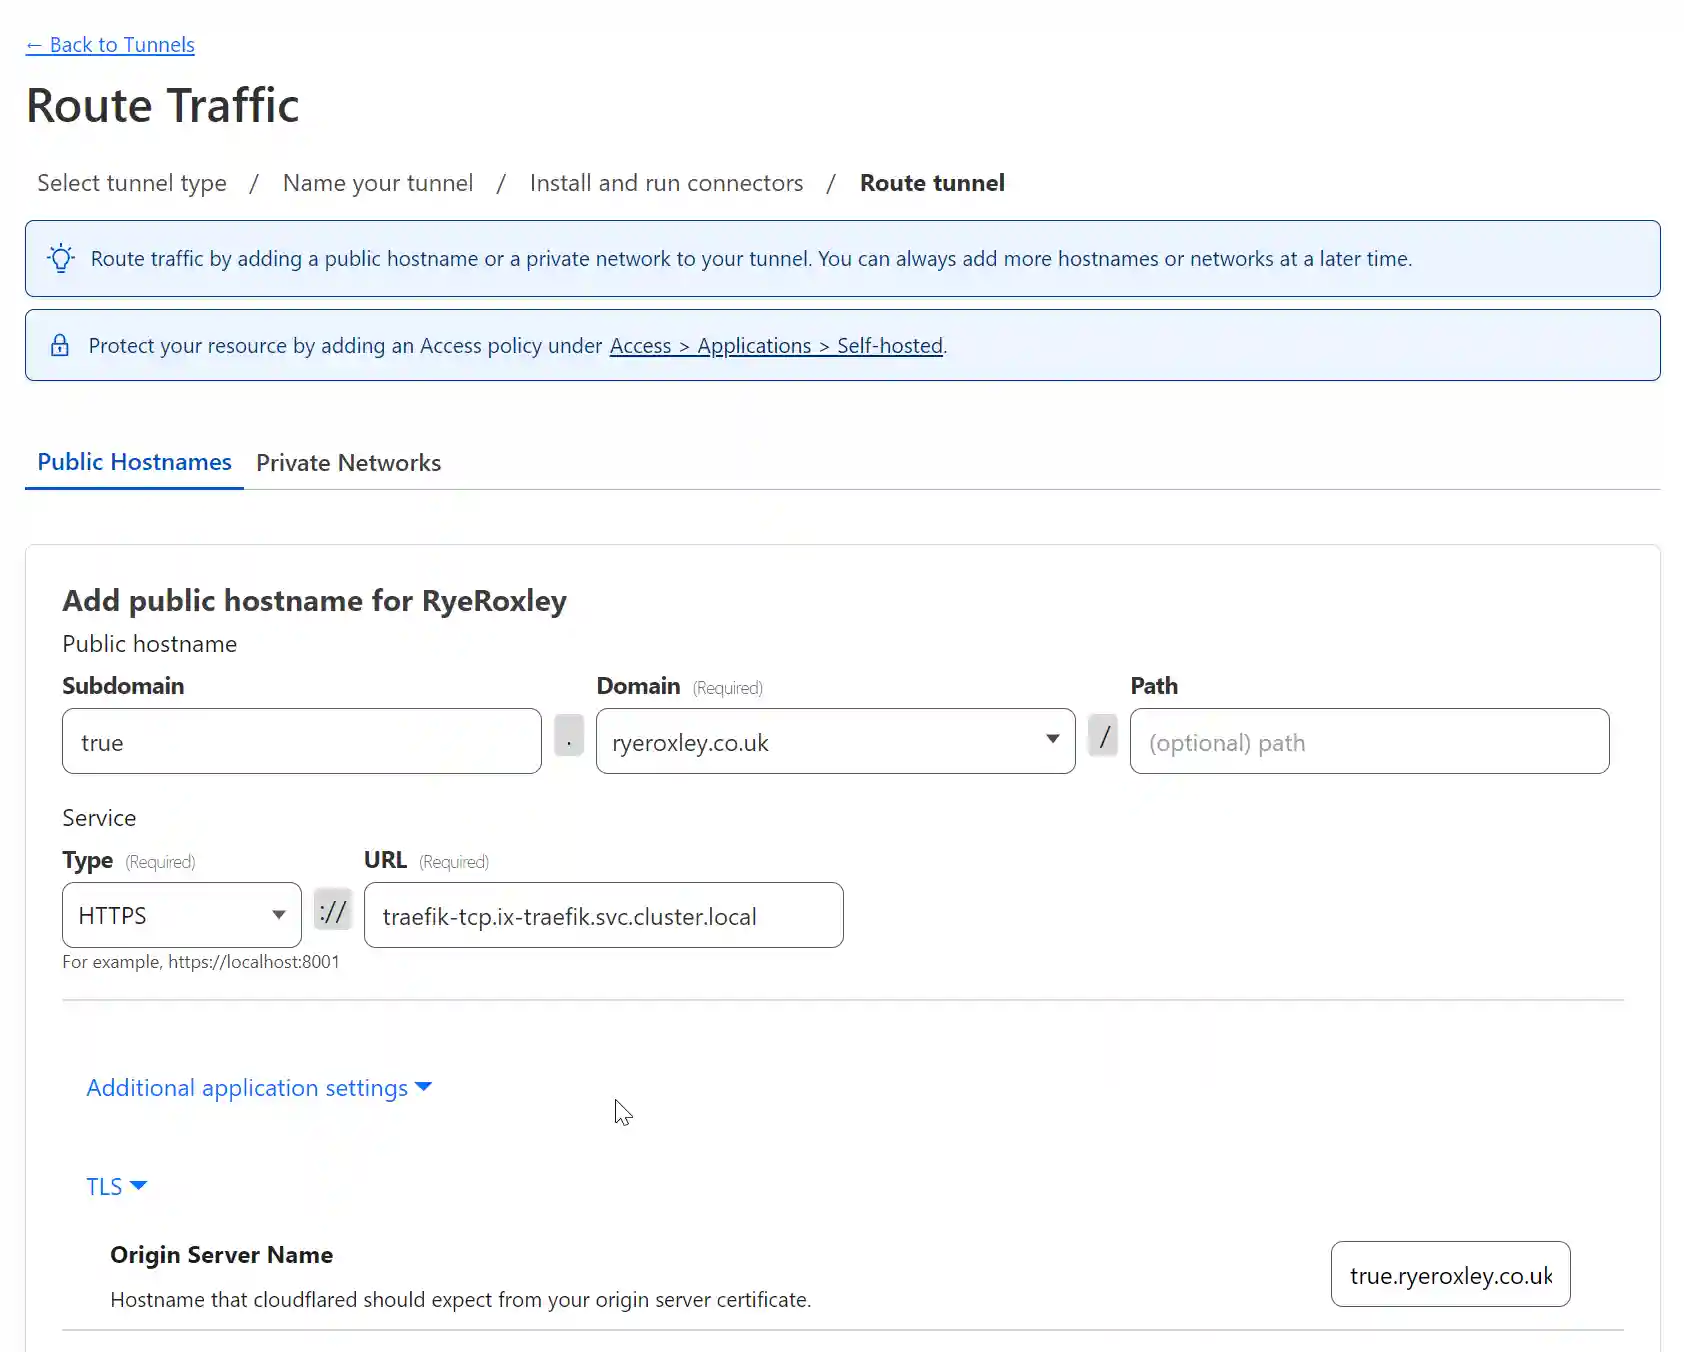
Click Next.The next form enables you to add a Subdomain to point to the service you are offering on this subdomain. As a test app TrueCommand is running so in Subdomain enter true. In Domain select the domain from the drop-down box. The path can be left blank.

Set the service type to HTTPS and the URL to "traefik-tcp.ix-traefik.svc.cluster.local"

Click "Additional application settings" then "TLS" and in the Original Server Name field enter the FQDN of the service. In this case true.ryeroxley.co.uk.

Scoll to the bottom and click "Save tunnel".

Screenshot of a web interface for configuring a public hostname under the "Route Traffic" section of a tunnel management system. The form fields include options for subdomain, domain, service type, URL, path, and additional settings related to TLS and origin server name.

If you now examine the DNS table for your domain, you will have an extra record pointing to the Cloudflare Tunnel.

Screenshot of the DNS management interface for the domain ryeroxley.co.uk, showing various DNS records including A, CNAME, MX, SRV, and TXT types with details on name, content, proxy status, and TTL.

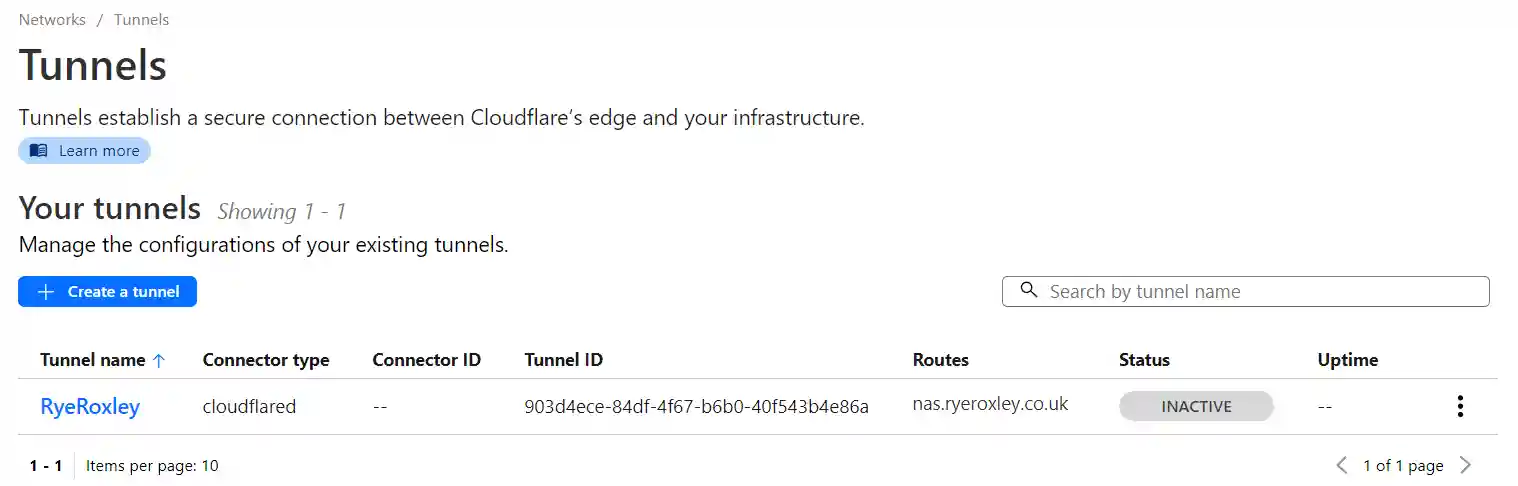
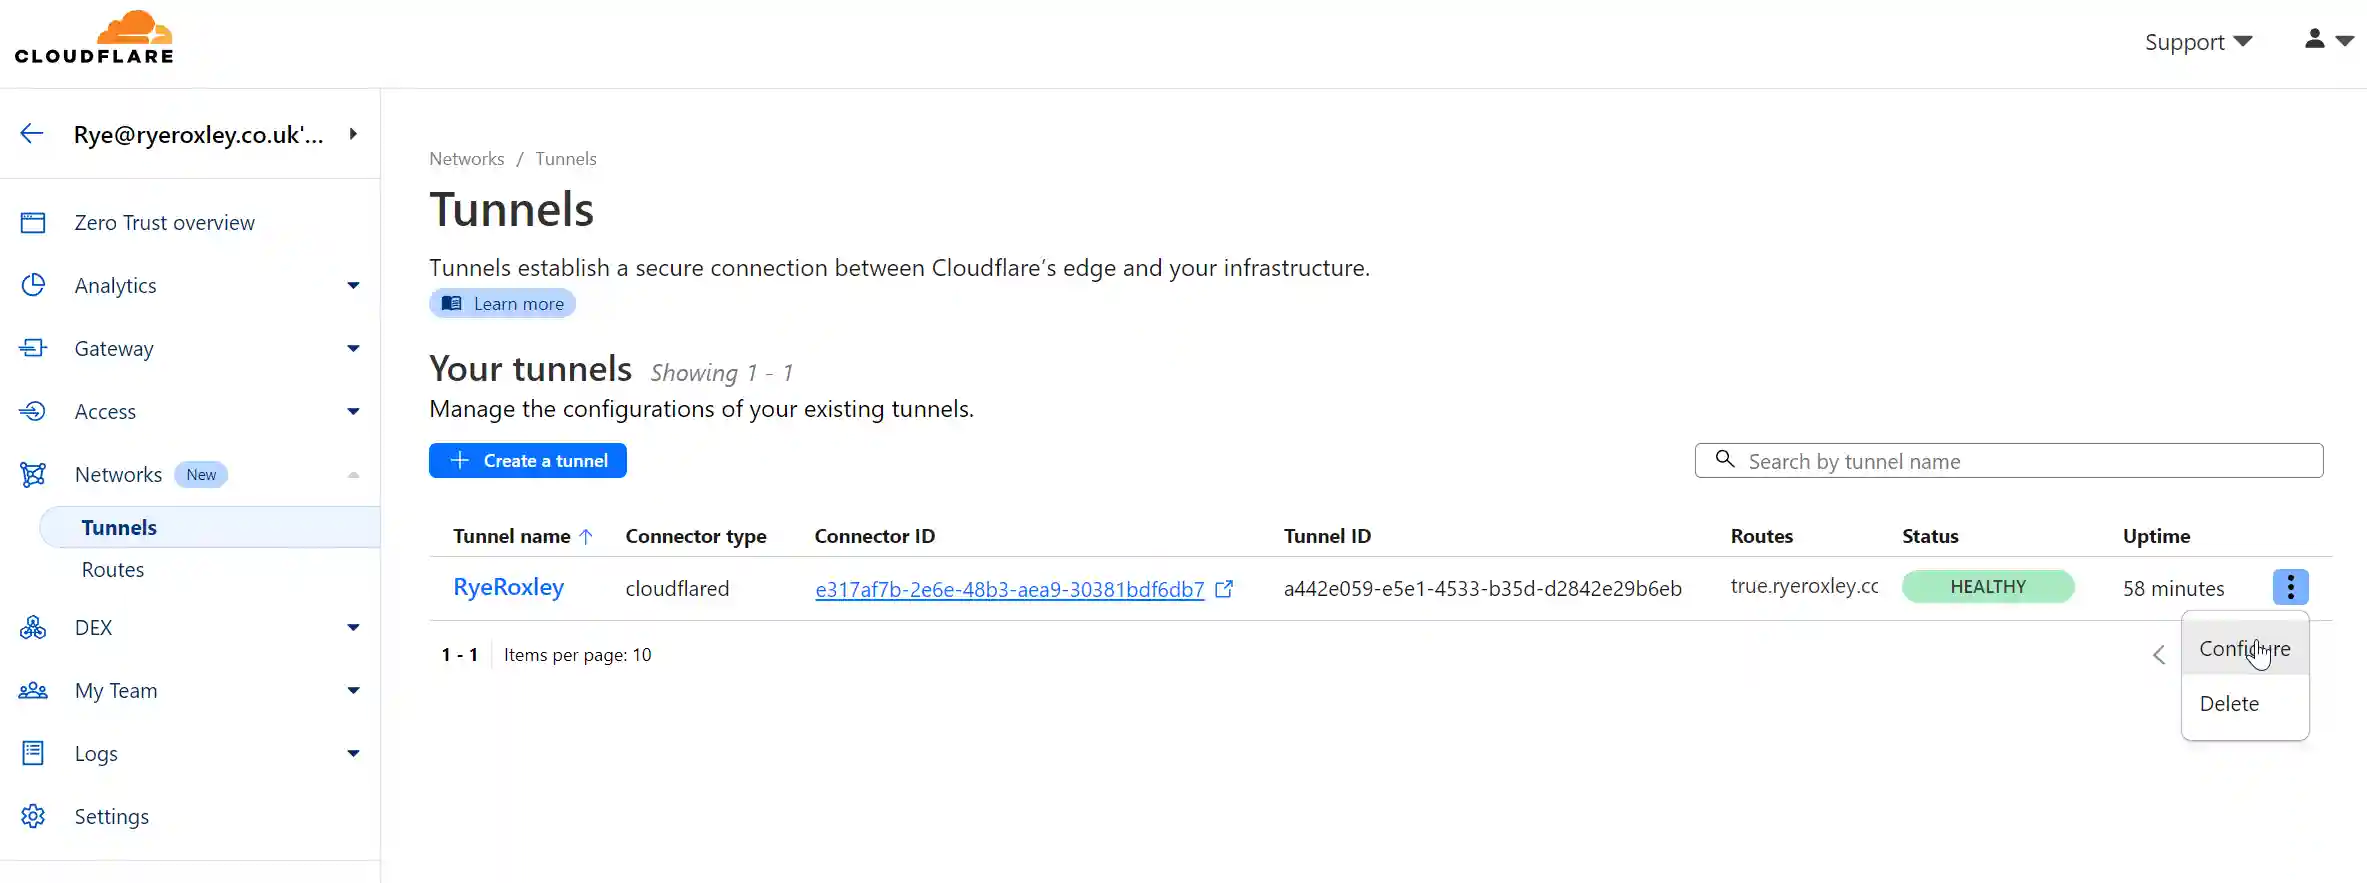
Return to the summary of your tunnels. As we have only set up one side of the tunnel configured the tunnel is inactive.

Cloudflare tunnels management page listing a single tunnel named 'RyeRoxley' with the type 'cloudflared', currently marked as 'INACTIVE', and routed to 'nas.ryeroxley.co.uk'.

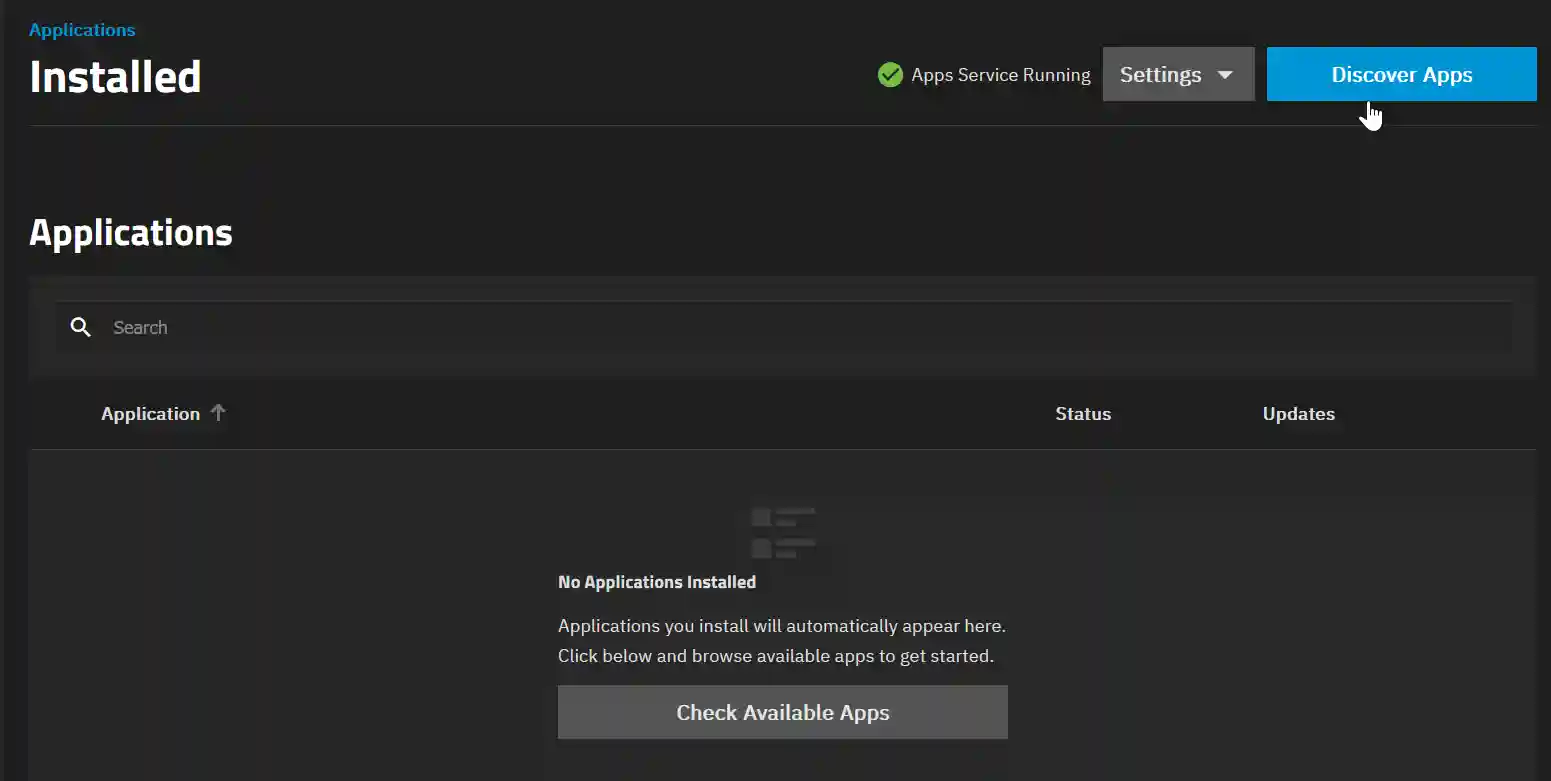
On your TrueNAS Scale device, go to Apps and click Discover Apps. Search for Cloudflared. This will return two Cloudflare apps, one by TrueNAS and one by TrueCharts. Click on the Truecharts version. Now click Install.

Dark-themed application management interface showing no installed applications with an option to 'Check Available Apps' and a highlighted button for 'Discover Apps'.
Search results for "cloudflared" on an app catalog interface, showing two versions of 'Cloudflared' and 'Dns-Doh-Companion' applications from Truecharts and TrueNAS catalogs.
The 'Cloudflared' app installation page with app version, resources, and maintainers information, including a large 'Install' button and links to the app's GitHub repository.

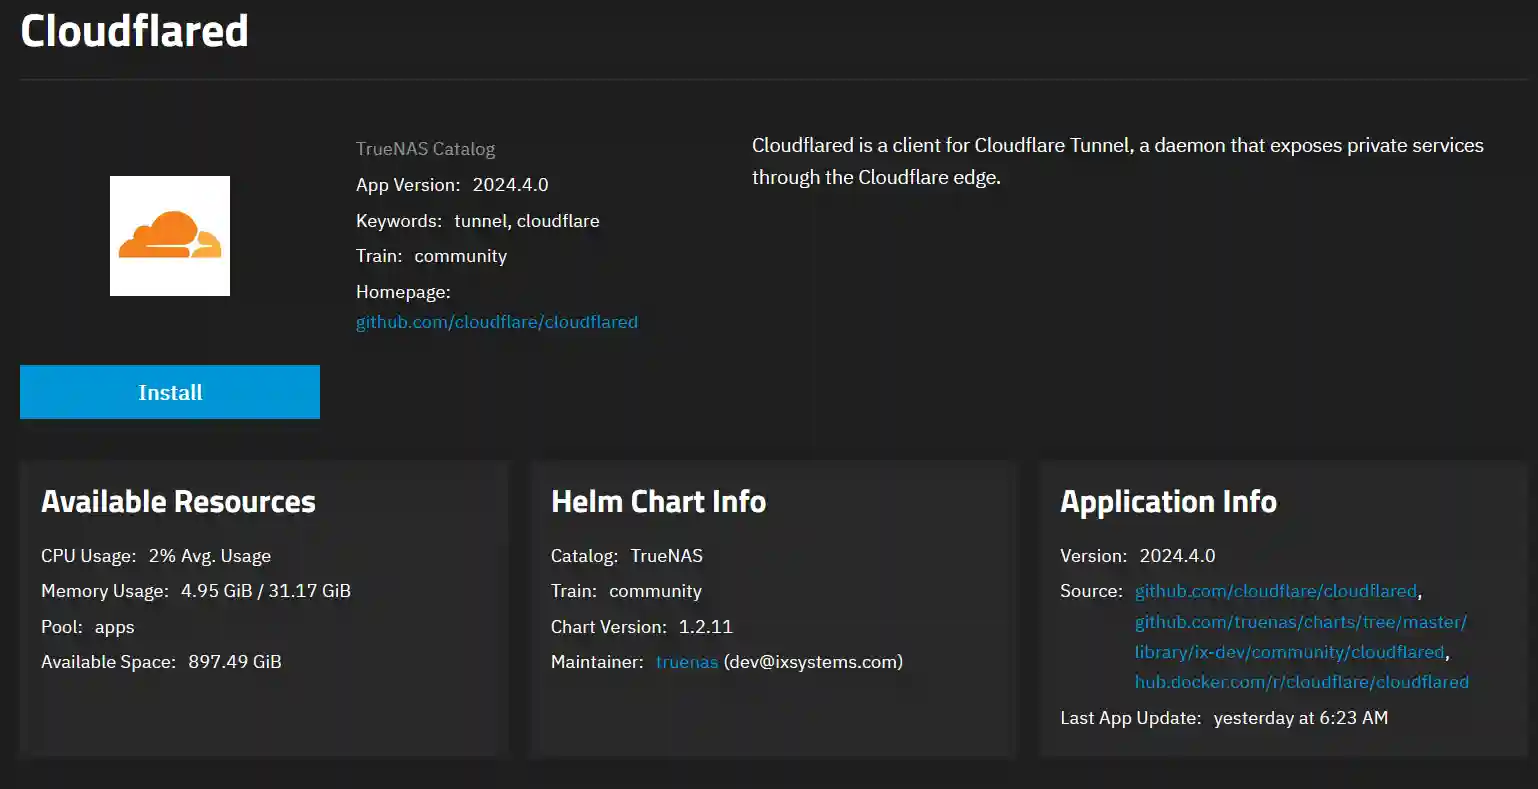
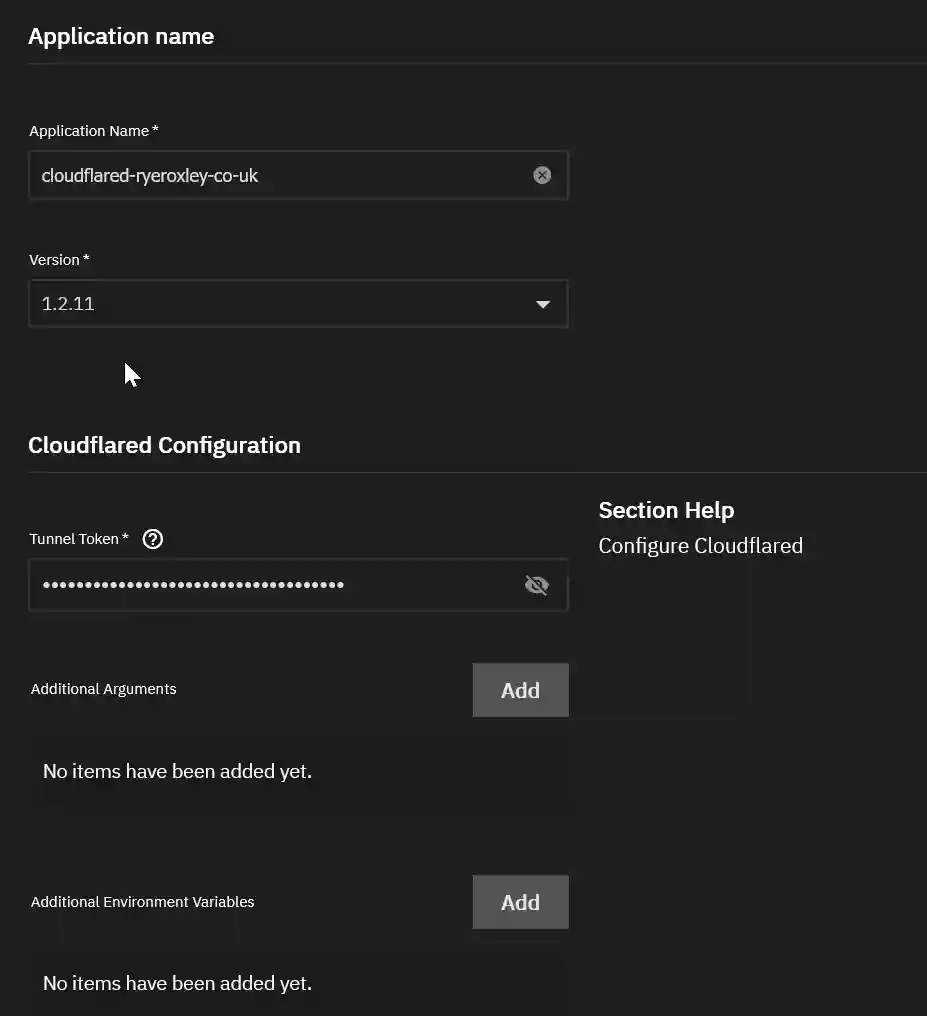
In the installation options, the only required option is the Tunnel Token, paste the token you saved earlier. All others can be left at default. For clarity, I have appended ryeroxley-co-uk to the Application name. Once completed, scroll down and click Install.

A configuration setup page for Cloudflared with fields for the application name, version, and tunnel token, and options to add additional arguments and environment variables.

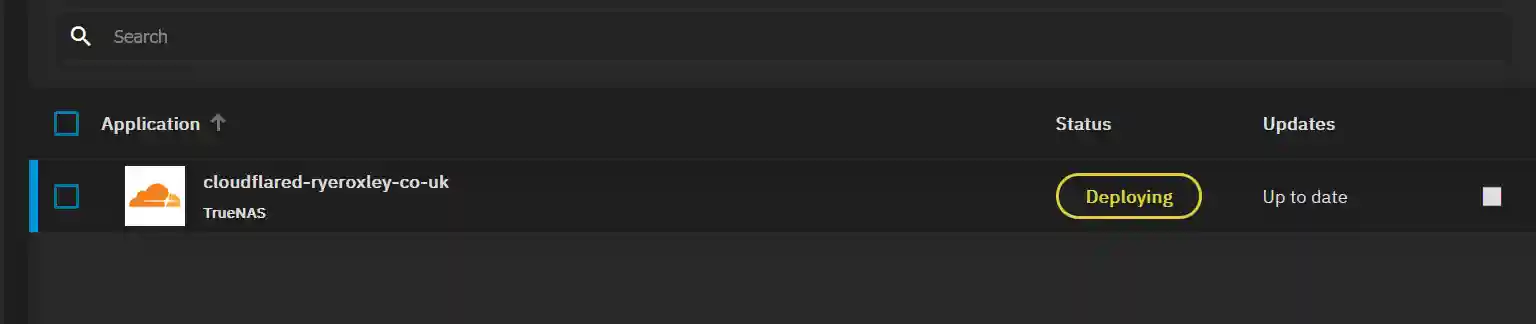
The App will start deploying, and then the status will turn to running.

The application 'cloudflared-ryeroxley-co-uk' from TrueNAS is currently deploying, with the status highlighted in yellow, and marked as 'Up to date'.
Dark-themed application management interface displaying 'cloudflared-ryeroxley-co-uk' from TrueNAS with a green 'Running' status, indicating successful deployment and current updates.

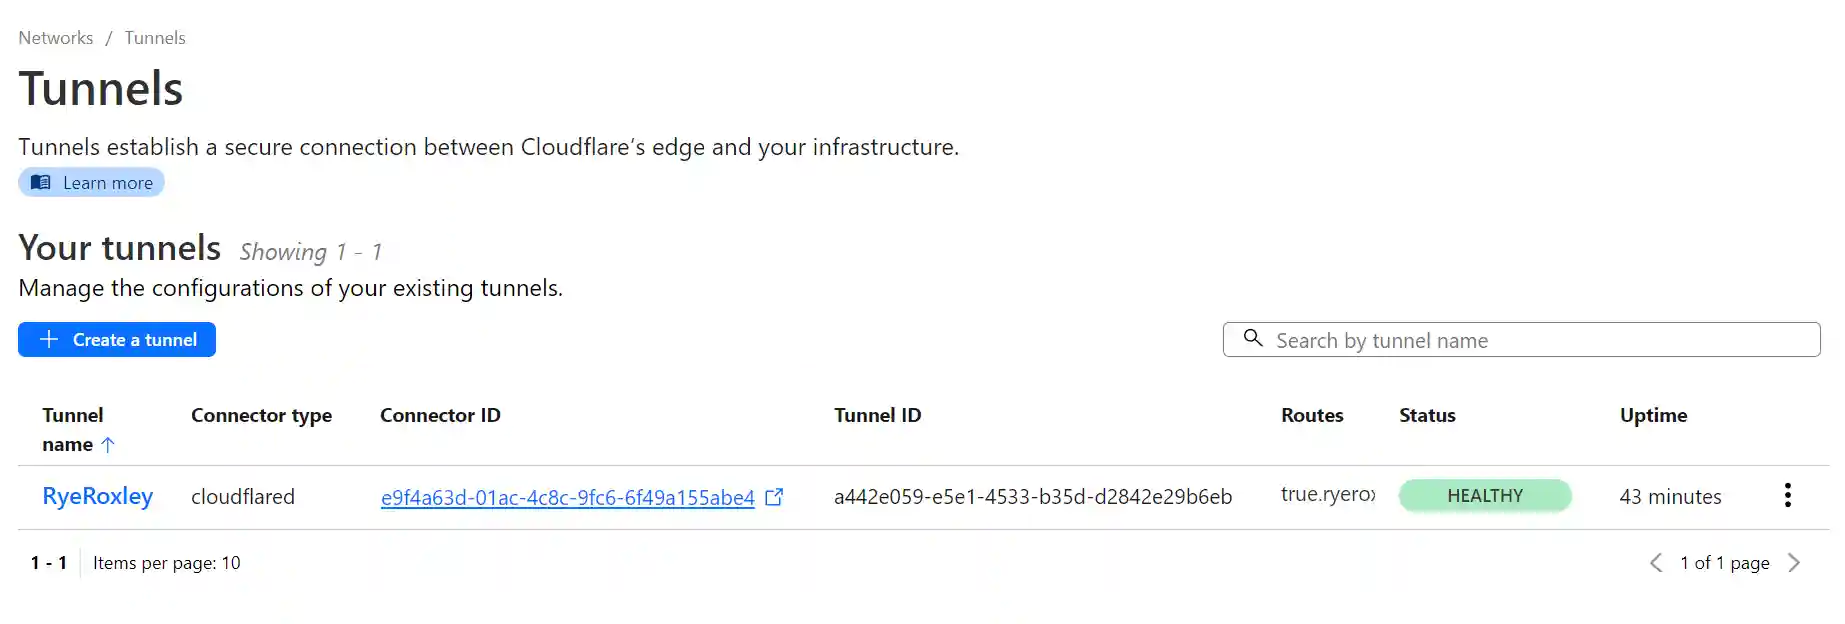
Return to the Cloudflare Tunnels page and click refresh. You should now see that the tunnel is healthy.

Screenshot of a web interface for managing network tunnels on Cloudflare, displaying a table with one active tunnel named "RyeRoxley". The table includes columns for Tunnel name, Connector type, Connector ID, Tunnel ID, Routes, Status, and Uptime, with the status showing as "HEALTHY" and uptime of 43 minutes.

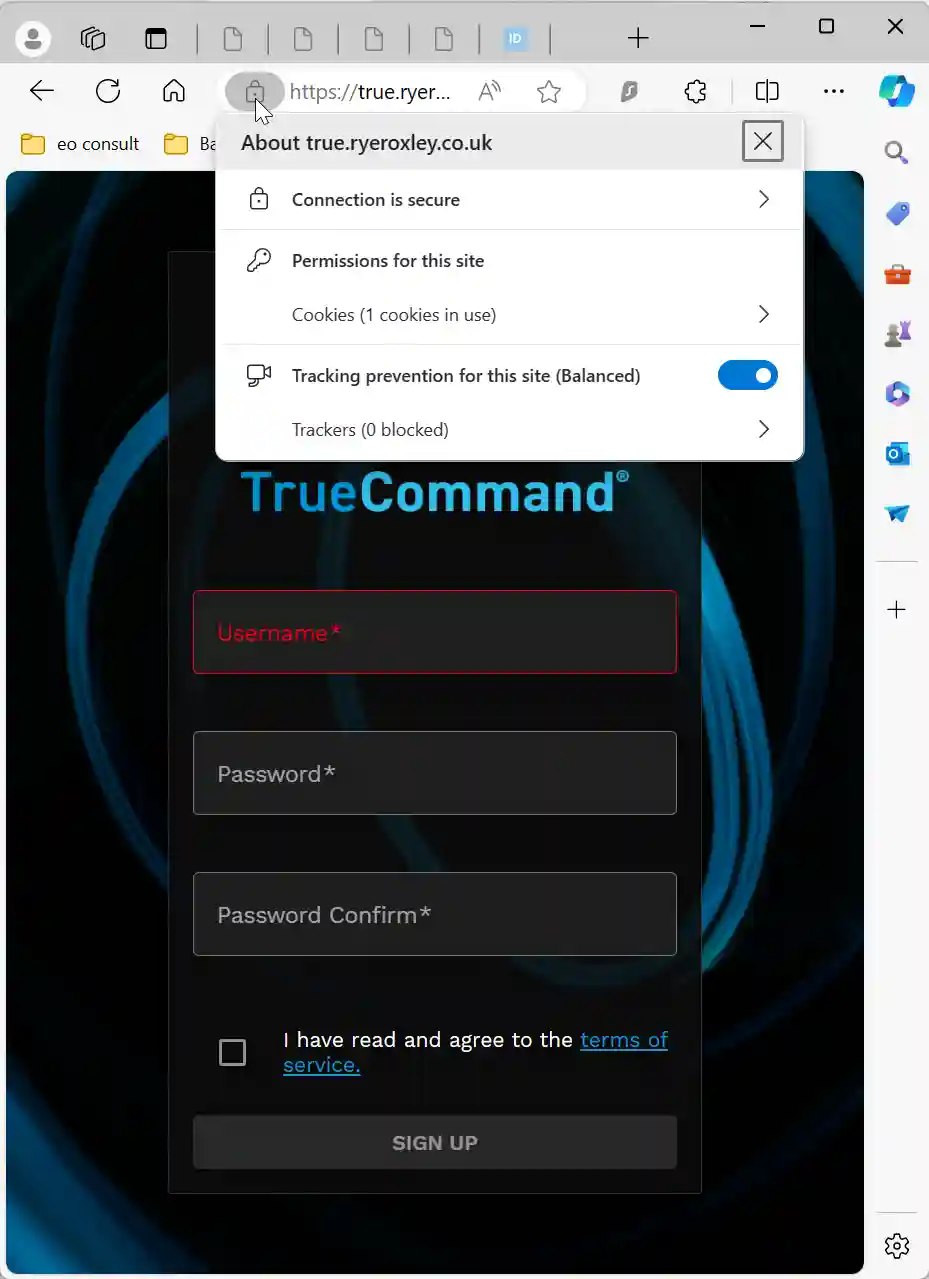
To connect to your service, such as TrueCommand, enter the URL true.ryeroxley.co.uk (or your equivalent URL) in your browser. This should take you directly to your service. For a comprehensive test, consider using a VPN or a mobile device with WiFi turned off, as the service is already available on the local network.

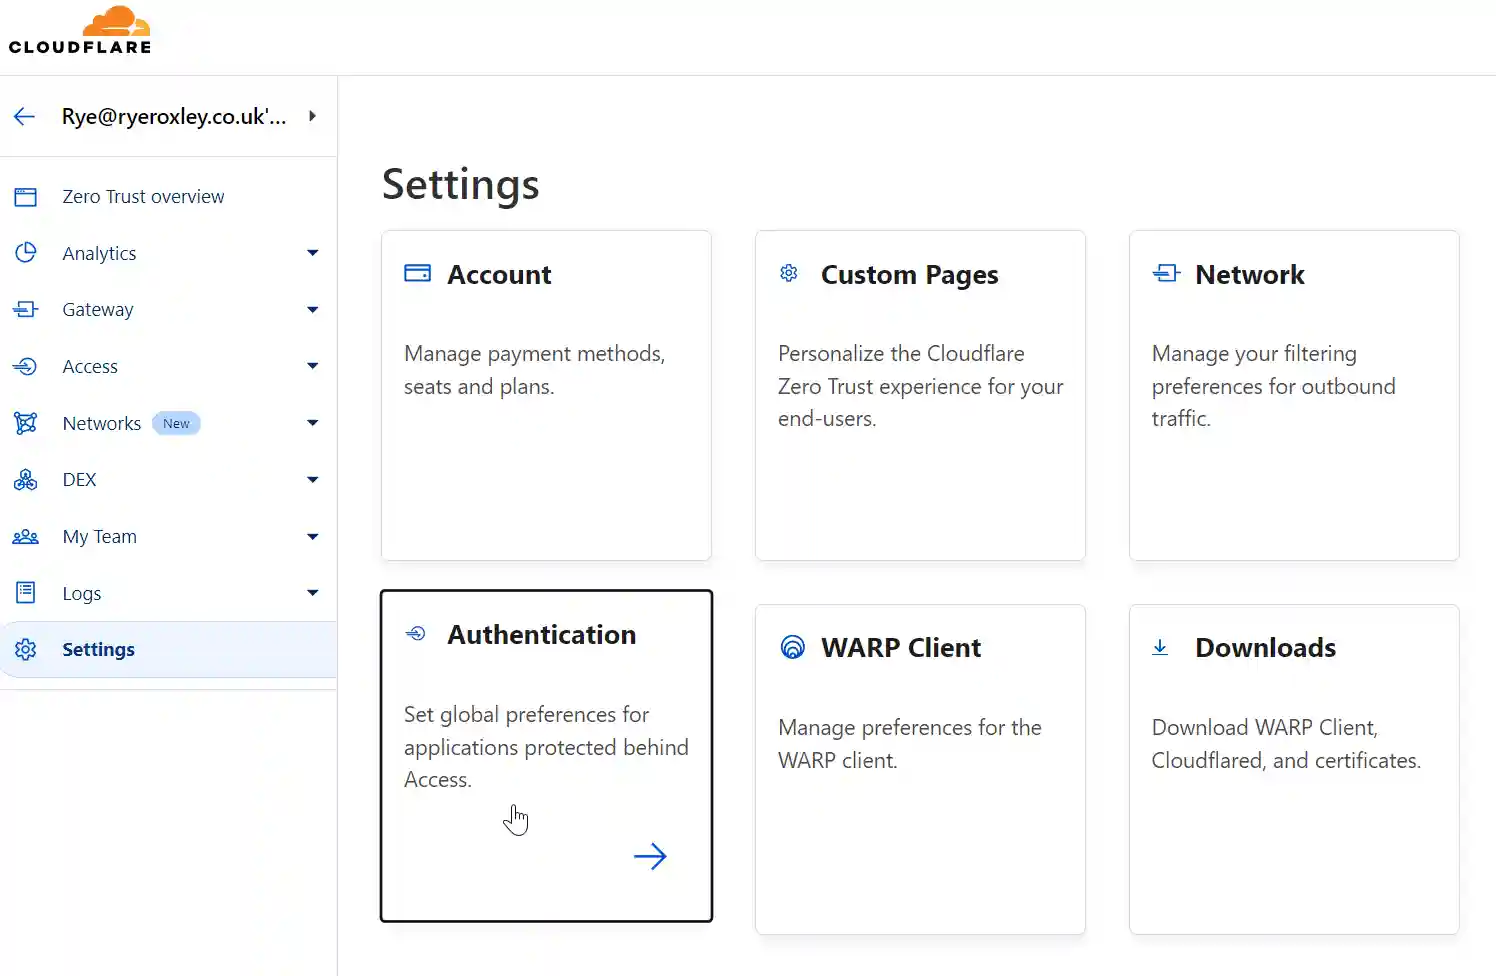
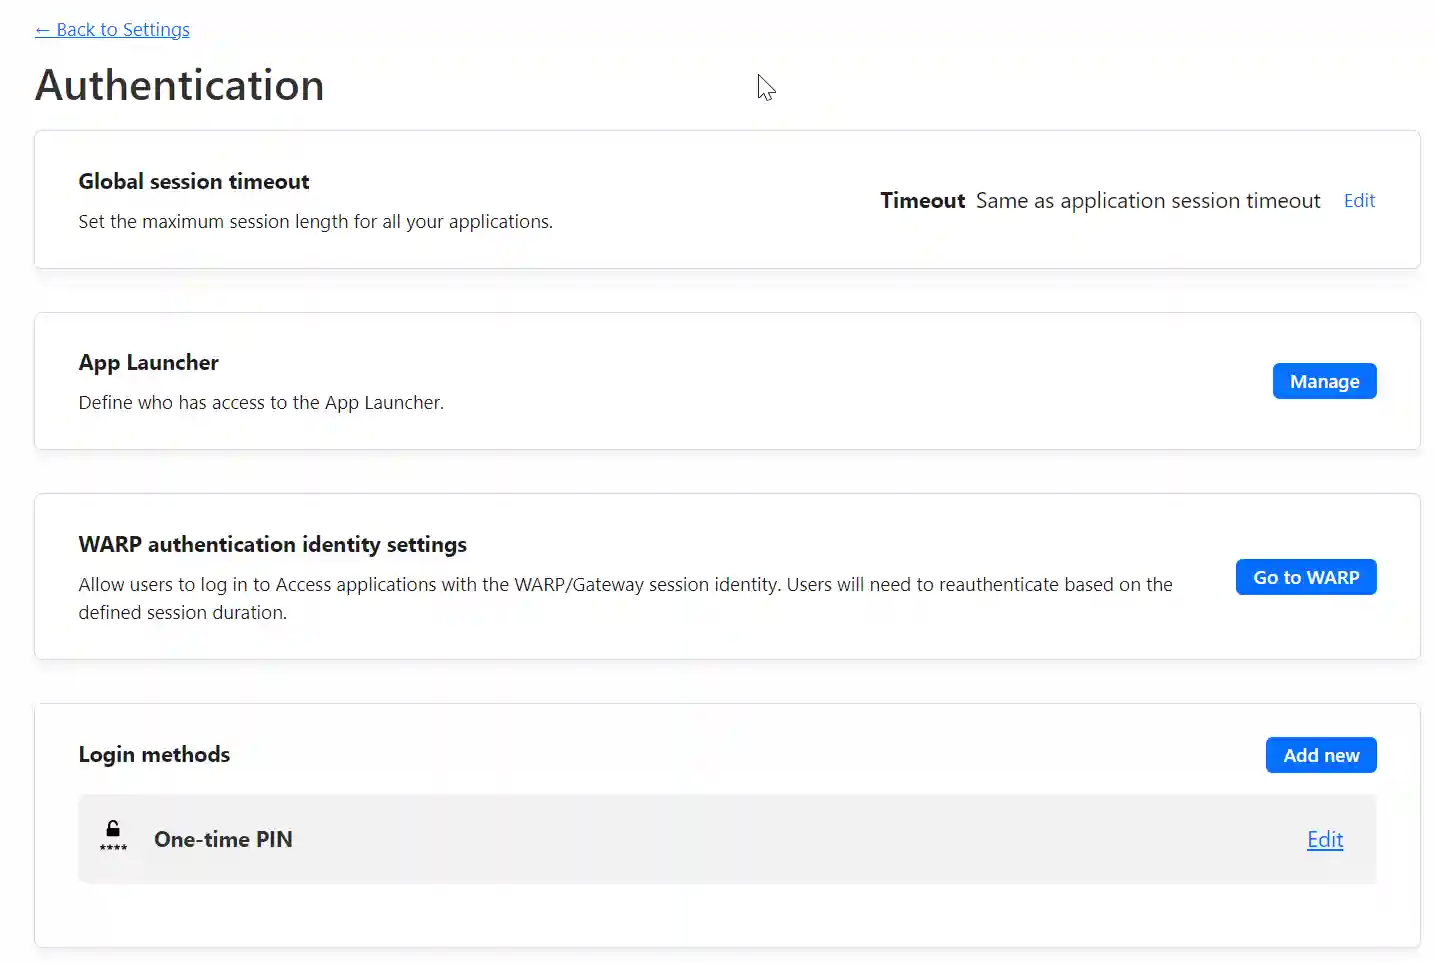
Currently, TrueCommand is accessible to anyone on the internet, which may not be secure. To add access restrictions, navigate to the ‘Settings’ section in the Cloudflare Zero Trust dashboard and select ‘Authentication’. Here, you’ll find various login methods. We’ll proceed with the One-time PIN option. During login, users will be prompted to enter their email address. If the system recognizes the email, it will send a PIN to that address. Users must enter this PIN on the login form to access the service.

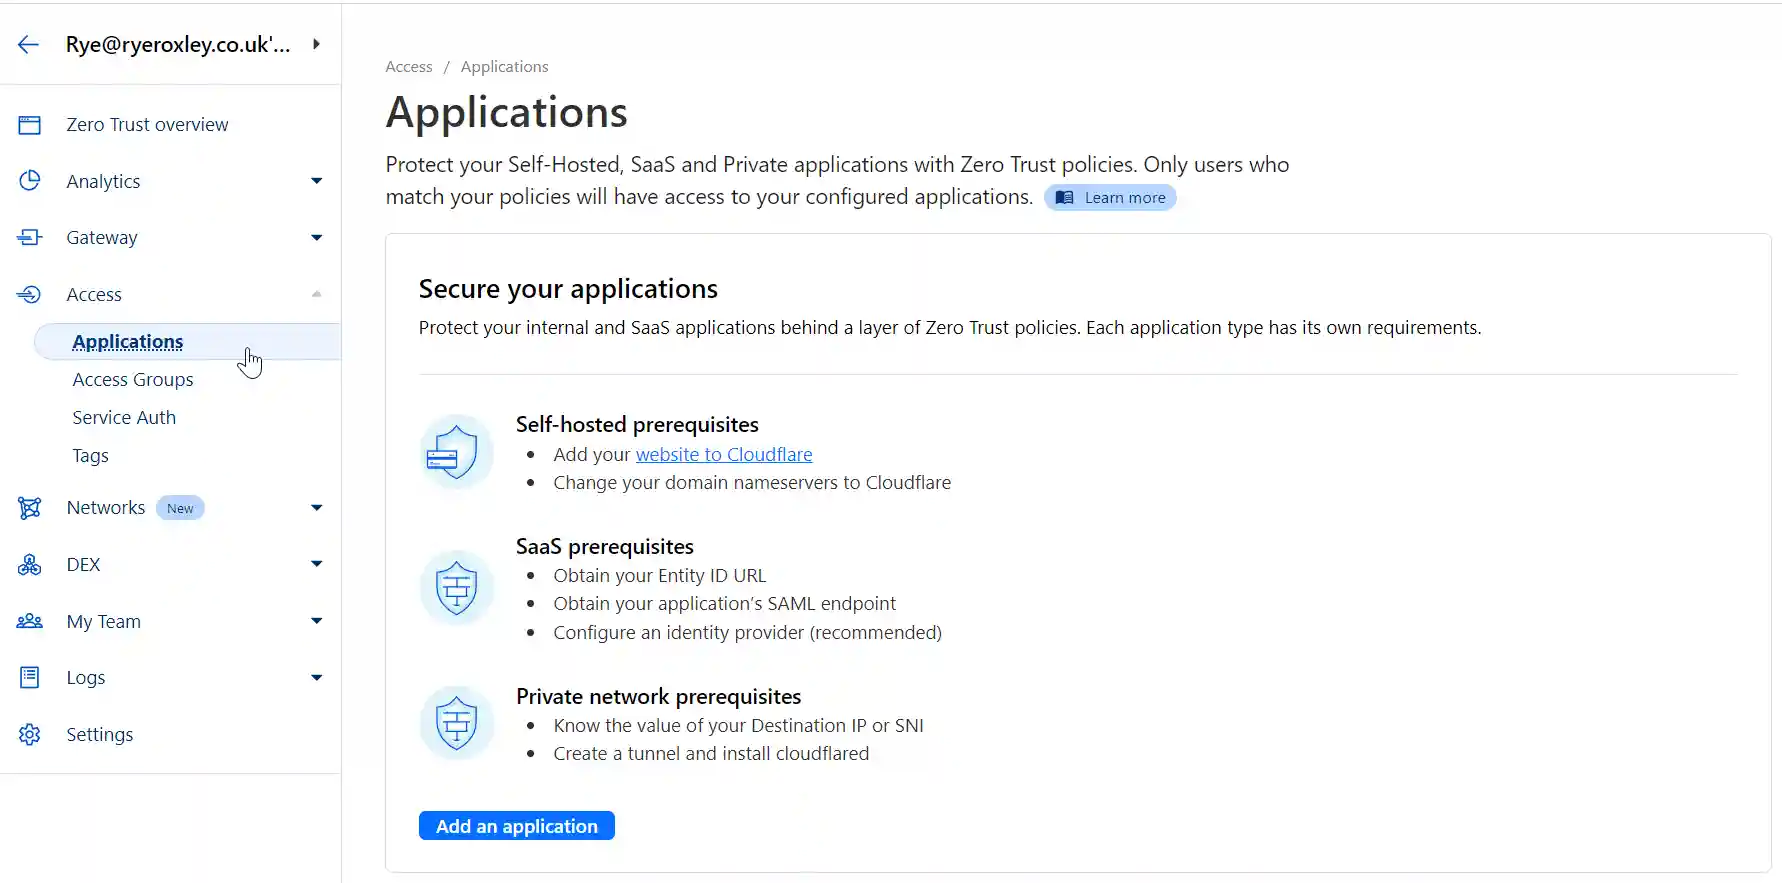
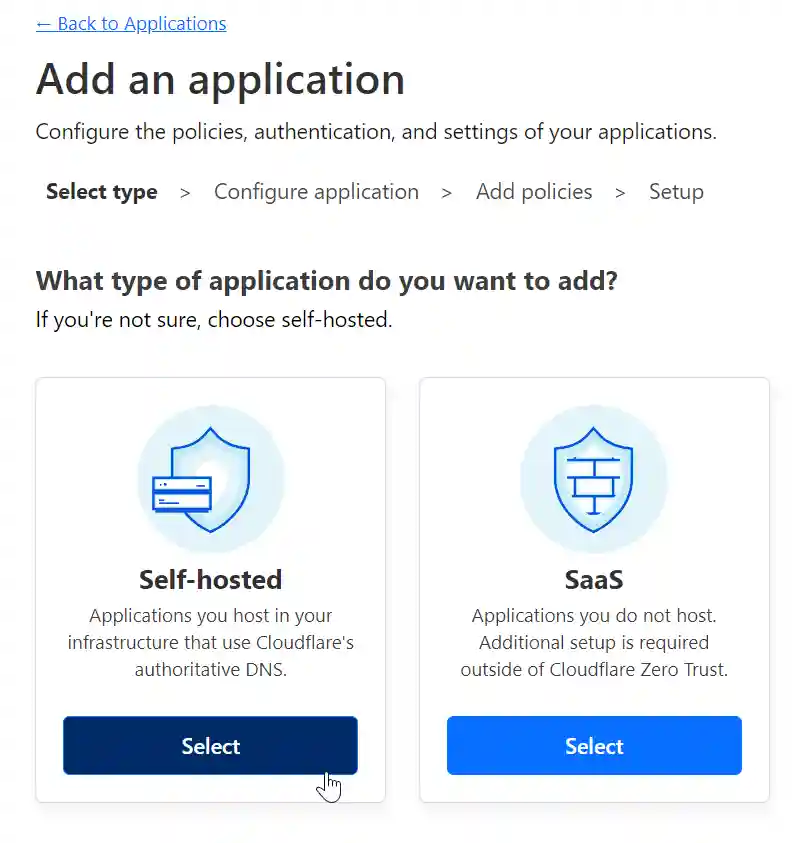
To set this up, go to 'Access' in the left-hand menu, click 'Applications', then select 'Add an application' followed by 'Self-hosted'.

A Cloudflare settings menu with options for Account, Custom Pages, Network, Authentication, WARP Client, and Downloads for management and customization of user experience and security settings.
Cloudflare Authentication settings page outlining options for global session timeout, app launcher access, WARP authentication identity settings, and login methods with a one-time PIN option.
Cloudflare access settings page, detailing the steps to secure applications through prerequisites for self-hosted, SaaS, and private network applications with an option to 'Add an application'.
A Cloudflare interface for adding an application, presenting two options: 'Self-hosted' for applications hosted in your own infrastructure and 'SaaS' for applications hosted externally, each with a 'Select' button.

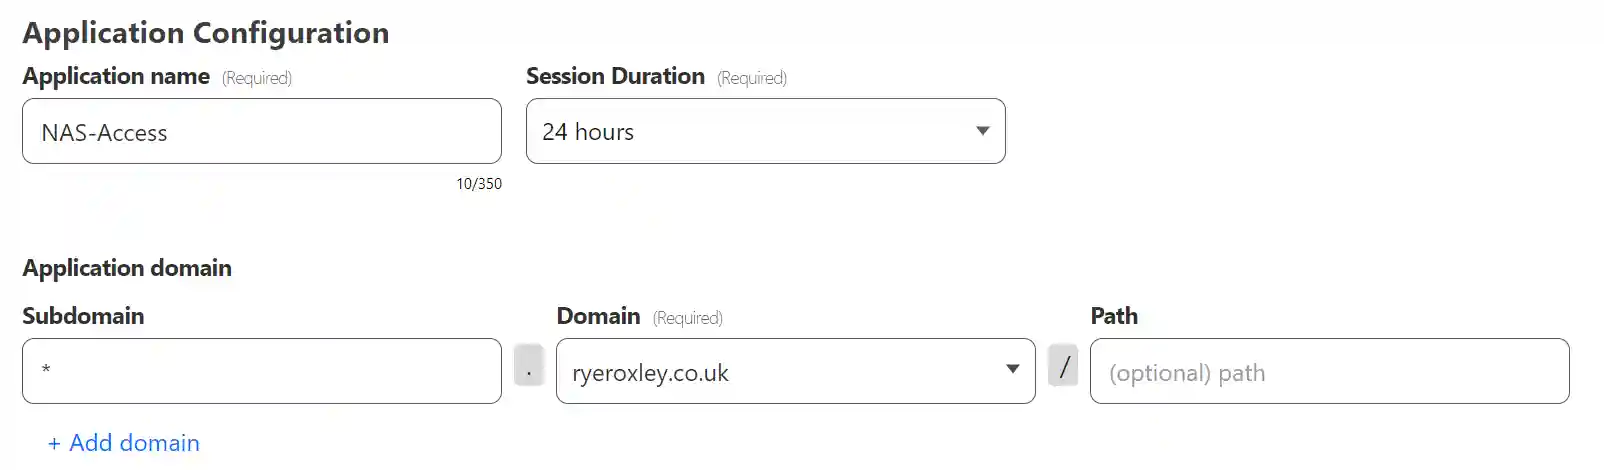
Decide whether the configuration will be applied to all subdomains or only particular ones. Enter an Application name—this can be anything. In the Subdomain field, enter either the wildcard * or the subdomain name. If you enter the wildcard, then the details will apply to all subdomains. Any subdomains not listed will be open to the internet; this is useful if you are hosting apps like WordPress.

A screenshot of an "Application Configuration" interface with fields for entering the application name, which is pre-filled as "NAS-Access", the session duration set to "24 hours", and the domain "ryeroxley.co.uk". Additional options include adding a domain and specifying a subdomain and path.

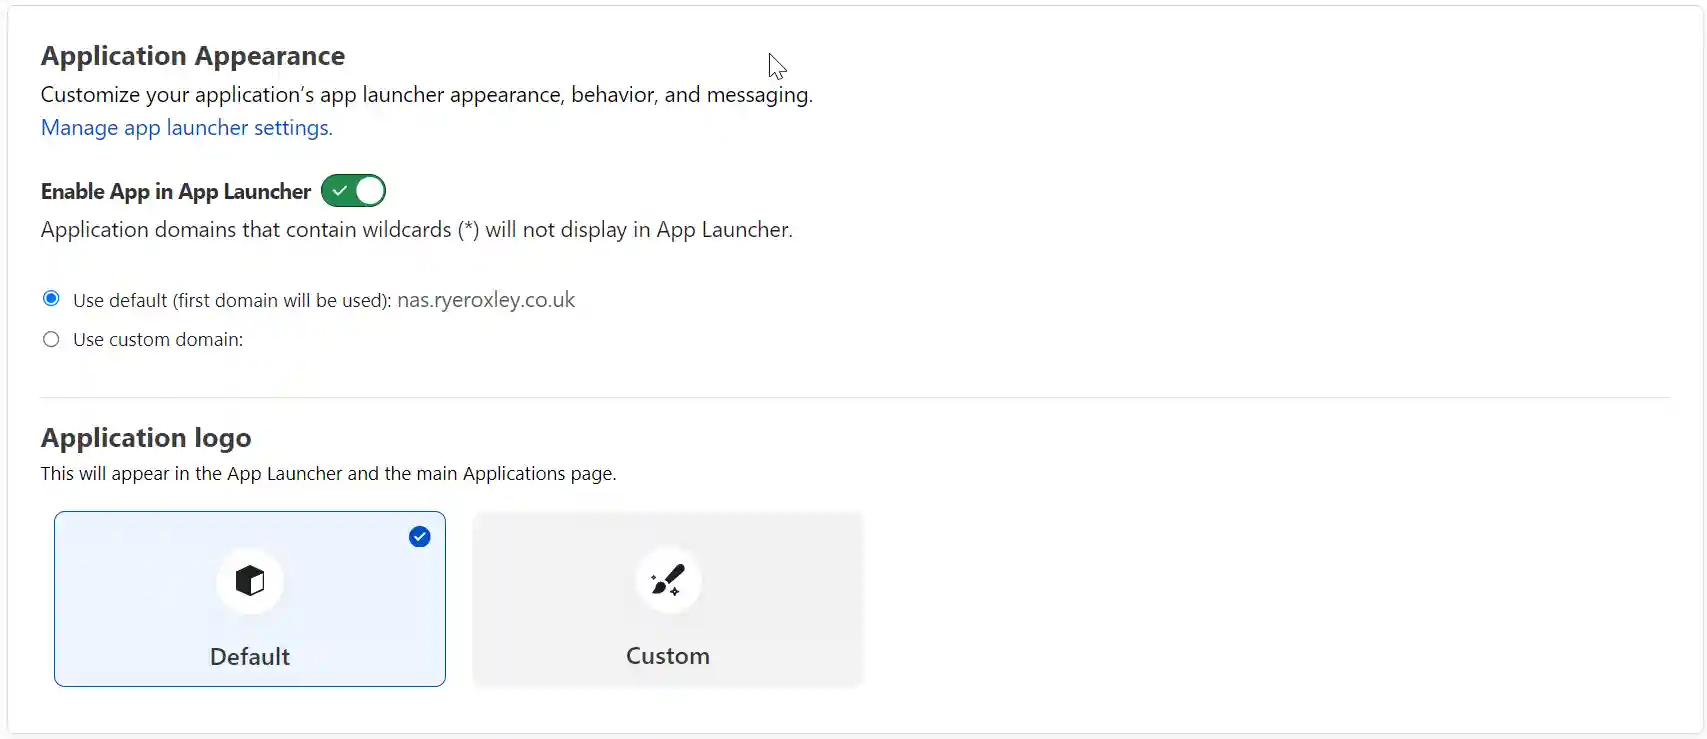
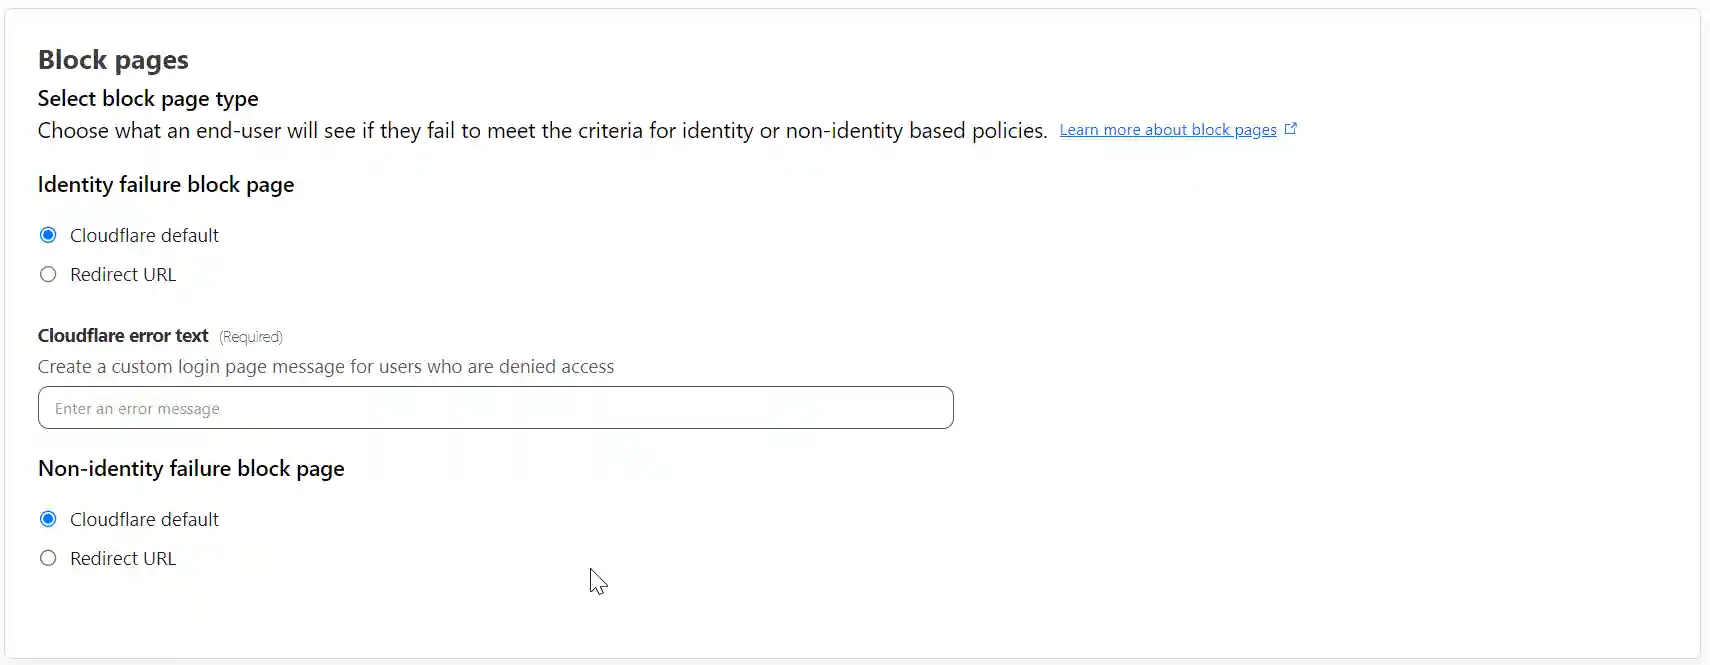
Scrolling down Application Apperancce, Tags and Block Pages can all be left at their defaults.

Configuration screen for Cloudflare App Launcher with options to enable the app, set default domain, and choose between default and custom application logos.
Cloudflare interface for adding tags to applications in the App Launcher, with a recommendation for a maximum of three tags per application and a capacity for 25 custom tags.
A Cloudflare settings panel for configuring block pages, allowing the selection between a default Cloudflare block page or a redirect URL, and a field to enter custom error text for denied access.

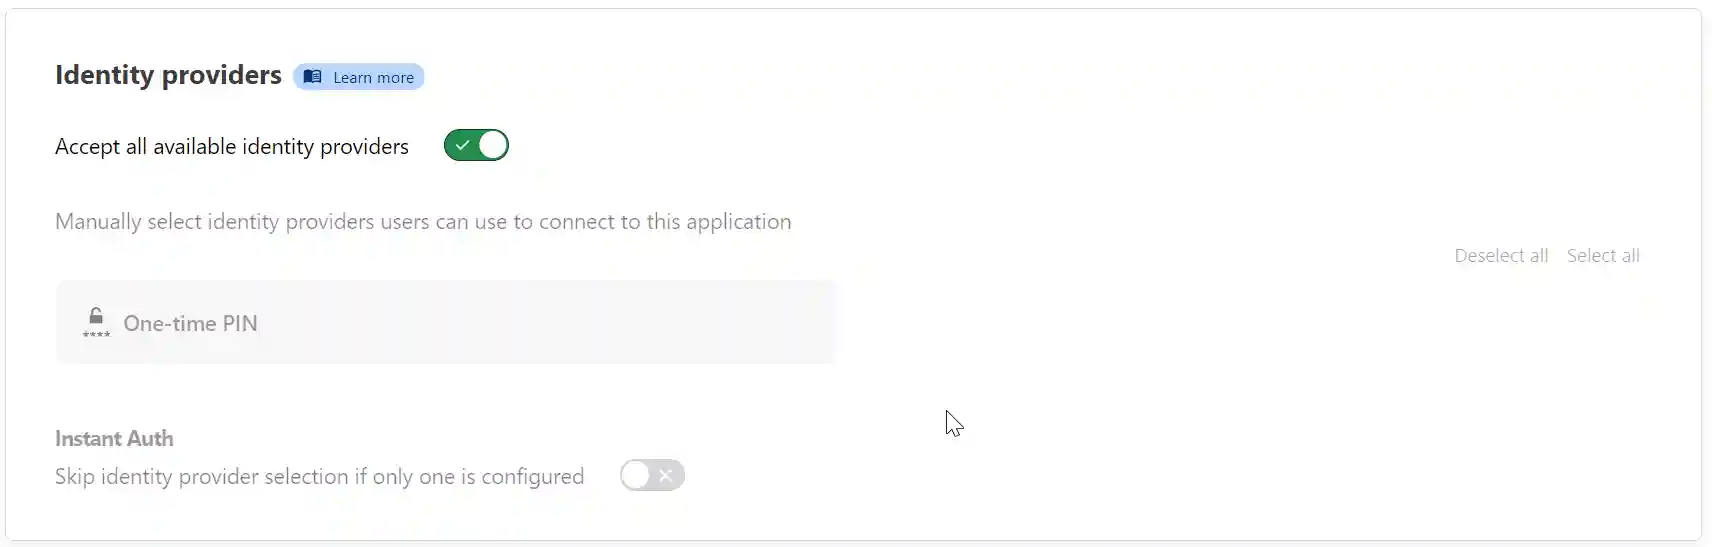
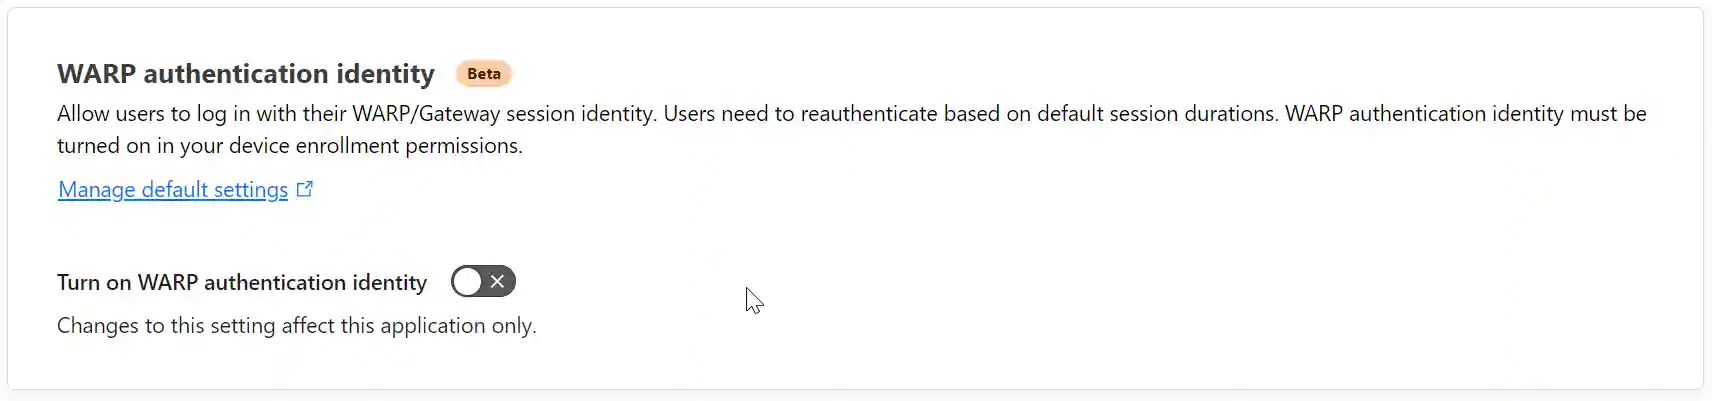
As only one identity provider has been enabled, only one is available here. They can be enabled or disabled on an individual basis. Ignore WARP as it is an enterprise product. Click Next.

The Cloudflare access settings interface for identity providers with options for accepting all providers, manually selecting providers for an application, and instant authentication settings.
A Cloudflare WARP authentication identity setting in beta, allowing users to log in with WARP/Gateway session identity, requiring reauthentication based on default session durations.

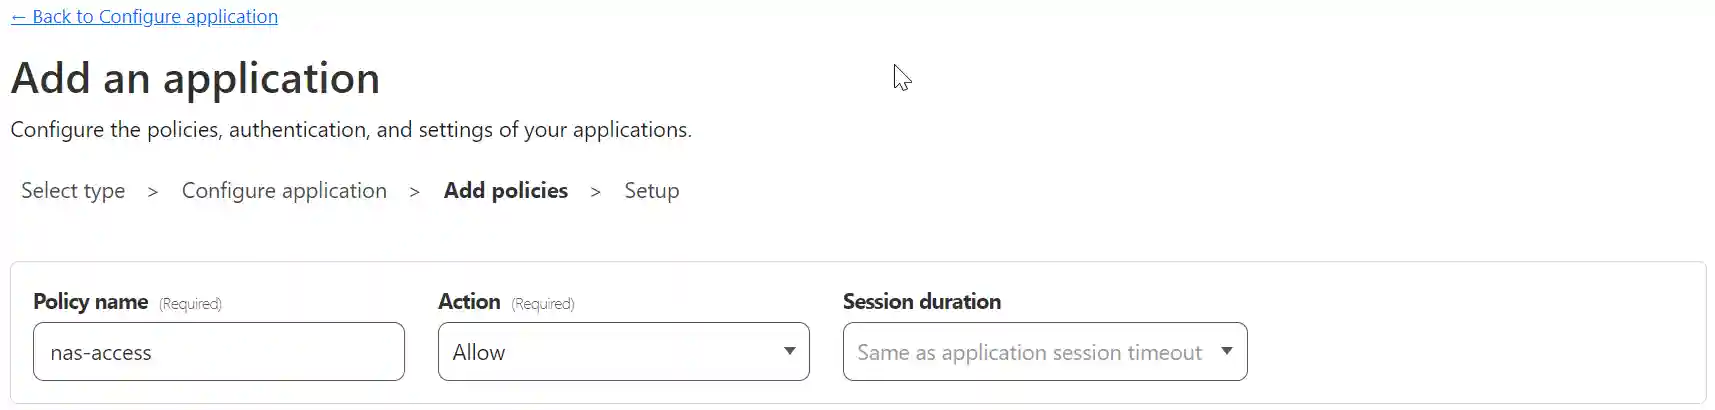
In the next section, set policies affecting the login. Give the policy a name, for example, “nas-access,” but it can be anything. The action is Allow. Leave Session duration set to “Same as application session timeout.”

A web interface for adding an application with policy settings that include a 'nas-access' policy name, action set to 'Allow', and session duration matching the application session timeout.

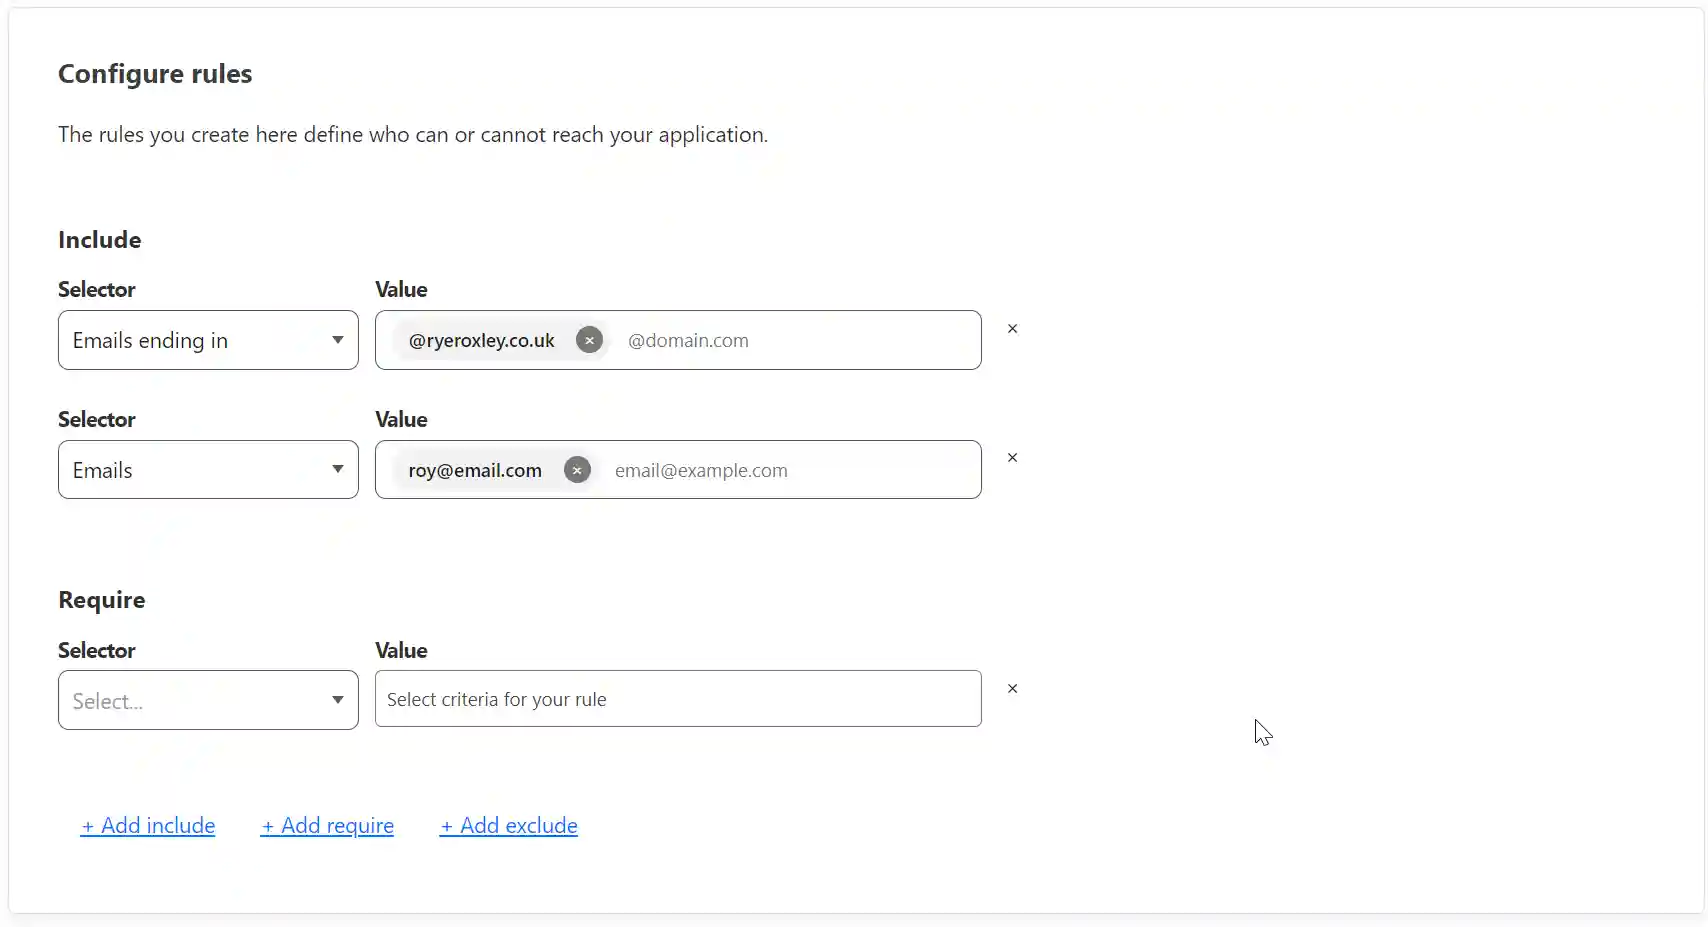
Next, configure the rules. It makes sense to allow only emails from a specific domain. By using the ‘+ Add include‘ option, it is possible to enable only particular emails, and the Require selector allows for greater security if needed.

A configuration panel for defining access rules to an application, with include rules set for specific email addresses and domains.

Additional settings can be left at their defaults. Click Next. On the final page, accept all the defaults and click Add application.

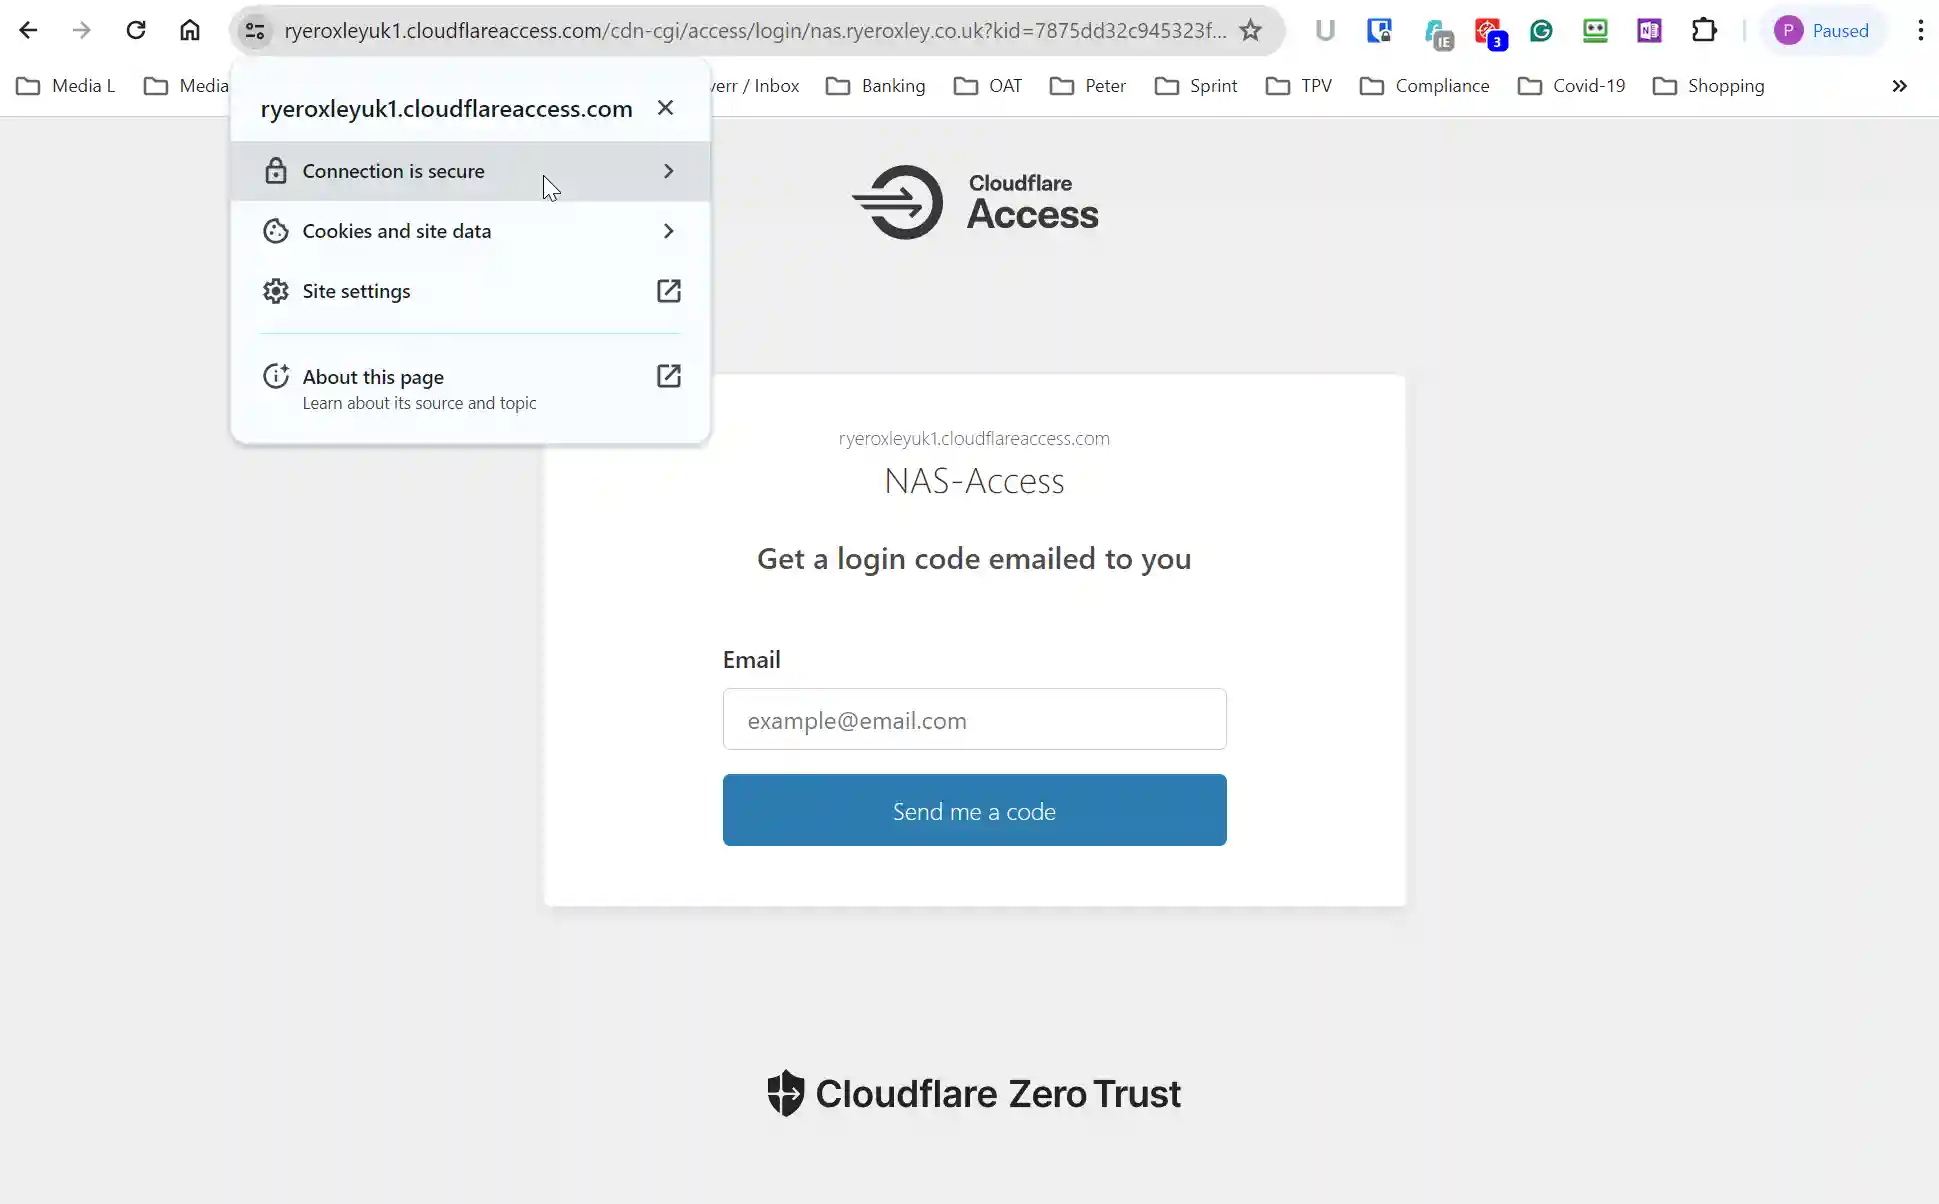
When you visit the subdomain you entered above (true.ryeroxley.co.uk), you will be challenged to enter your email address:

Login screen for Cloudflare Zero Trust application access.

Note:

  • The subdomain has been replaced with a Cloudflare domain. In this case, “https://ryeroxleyuk1.cloud…..” this will change once you are logged in
  • The protocol in use is HTTPS, and the connection is secure

Enter an email address, and you will receive an email with the PIN that can be entered in the resulting challenge box. You will then be taken to your service:

Screenshot of a website login page displaying fields for username, password, and password confirmation, highlighted by a glowing blue abstract background.

If you see an error page then return to the begining of this blog and check all the steps.

If everything is functioning properly and you want to enhance speed and security, consider enabling HTTP/2. In Cloudflare, navigate back to the Tunnel, click on the ellipsis, and select 'Configure'.

Screenshot of the Cloudflare web interface displaying the "Tunnels" section where a tunnel named "RyeRoxley" is listed as connected via a "cloudflared" connector, showing details like connector ID, tunnel ID, routes, status marked as "HEALTHY", and uptime of 58 minutes.

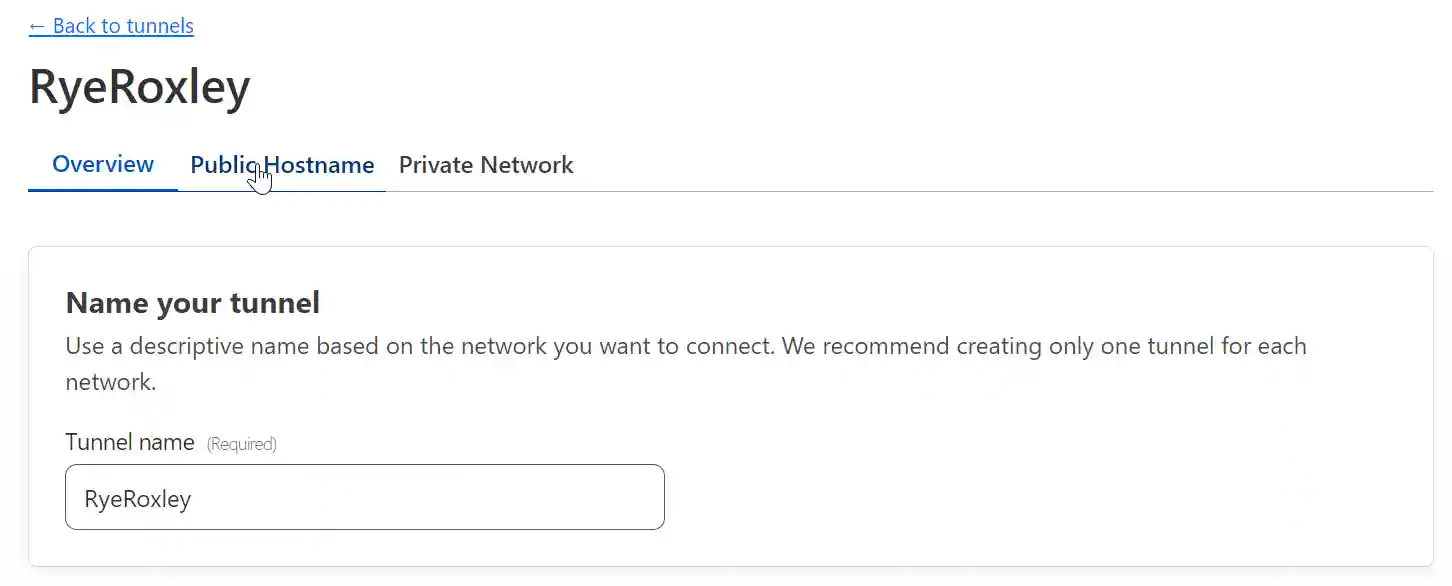
Next select Public Hostname:

A computer screen displaying the "RyeRoxley" network configuration interface, with tabs labeled Overview, Public Hostname, and Private Network. A section titled "Name your tunnel" prompts for a descriptive tunnel name, with "RyeRoxley" already entered in the field.

Once again click on the elipsis and select Edit:

A user interface for managing public hostnames, displaying the name "RyeRoxley" at the top, with tabs for Overview, Public Hostname, and Private Network. The section visible shows a list of public hostnames with an option to add a new one. The only listed hostname is "true.ryeroxley.co.uk" assigned to a service with a complex URL and a catch-all rule for HTTP status 404.

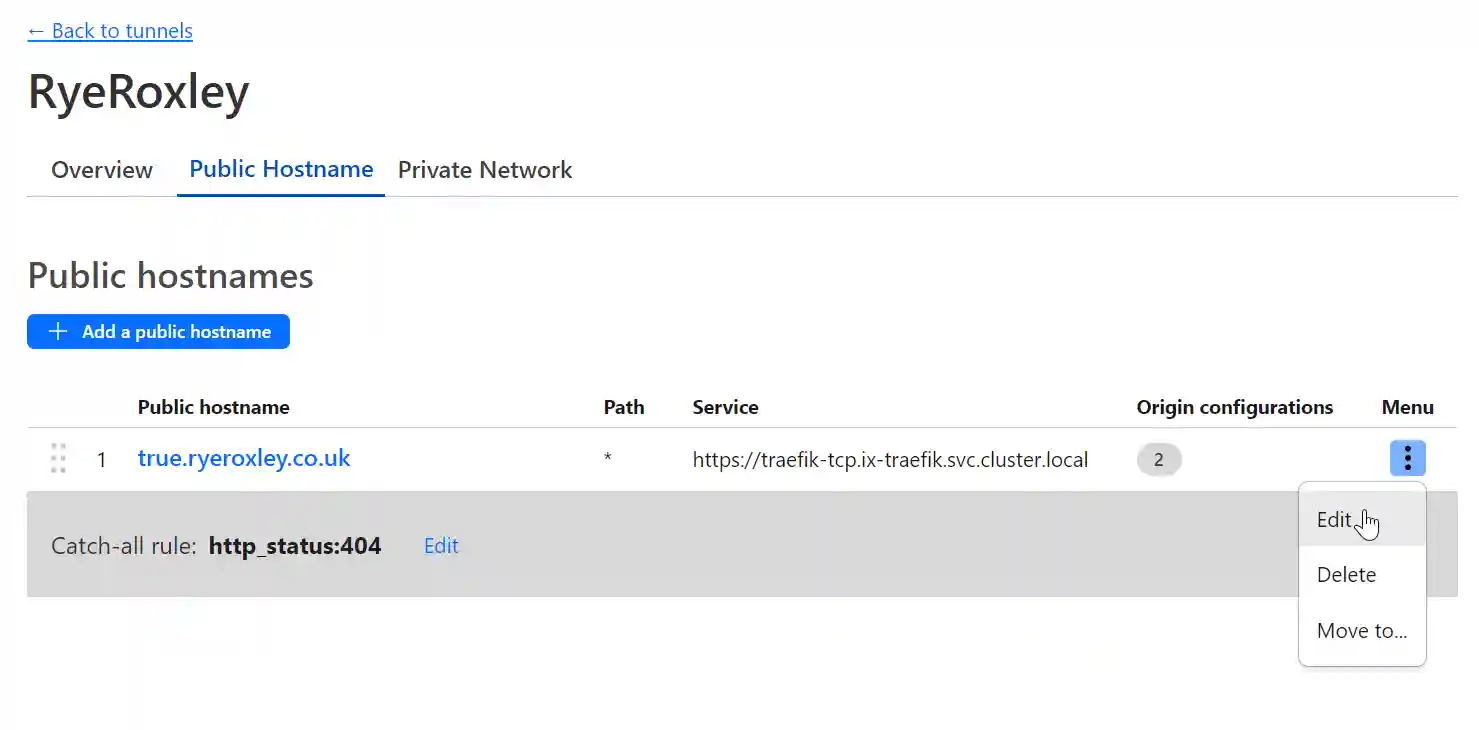
Click "Additional application settings" then "TLS" and enable HTTP2:

A user interface element displays a green "Enabled" checkmark next to the text "HTTP2 connection" and a warning message indicating that the origin server must be configured with HTTPS for HTTP2 connections.

5. Conclusion

For each new subdomain/App you will need to :

  1. Setup a public hostname in Cloudflare
  2. Enable Ingress in the App
  3. Add a local DNS record
  4. Enable access to the app through Cloudflare (optional)